| id | samples-node-jwt | |||||
|---|---|---|---|---|---|---|
| title | NodeJS - JWT Sample Application | |||||
| sidebar_label | NodeJS - JWT + Postgres | |||||
| description | The following sample app showcases how to use NodeJS framework with JWT and the Keploy Platform. | |||||
| tags |
|
|||||
| keyword |
|
import Link from '@docusaurus/Link' import InstallReminder from '@site/src/components/InstallReminder'; import SectionDivider from '@site/src/components/SectionDivider'; import ProductTier from '@site/src/components/ProductTier';
A simple sample CRUD application to test using Keploy build with Node, JWT and Postgres. Buckle up, it's gonna be a fun ride! 🎢
Clone the repository and move to express-mongo folder
git clone https://github.com/keploy/samples-typescript && cd samples-typescript/node-jwt

# Install the dependencies
npm install
We'll be running our sample application right on Linux, but just to make things a tad more thrilling, we'll have the database (postgres) chill on Docker. Ready? Let's get the party started!🎉
If you are using WSL on windows then use below to start wsl in the user's home directory:
wsl ~docker-compose up -dsudo -E env PATH=$PATH keploy record -c 'node app.js'<img src="https://keploy-devrel.s3.us-west-2.amazonaws.com/keploy-jwt-record-local.png" alt="Sample Keploy Test Result Node JWT" width="100%" style={{ borderRadius: '5px' }} />
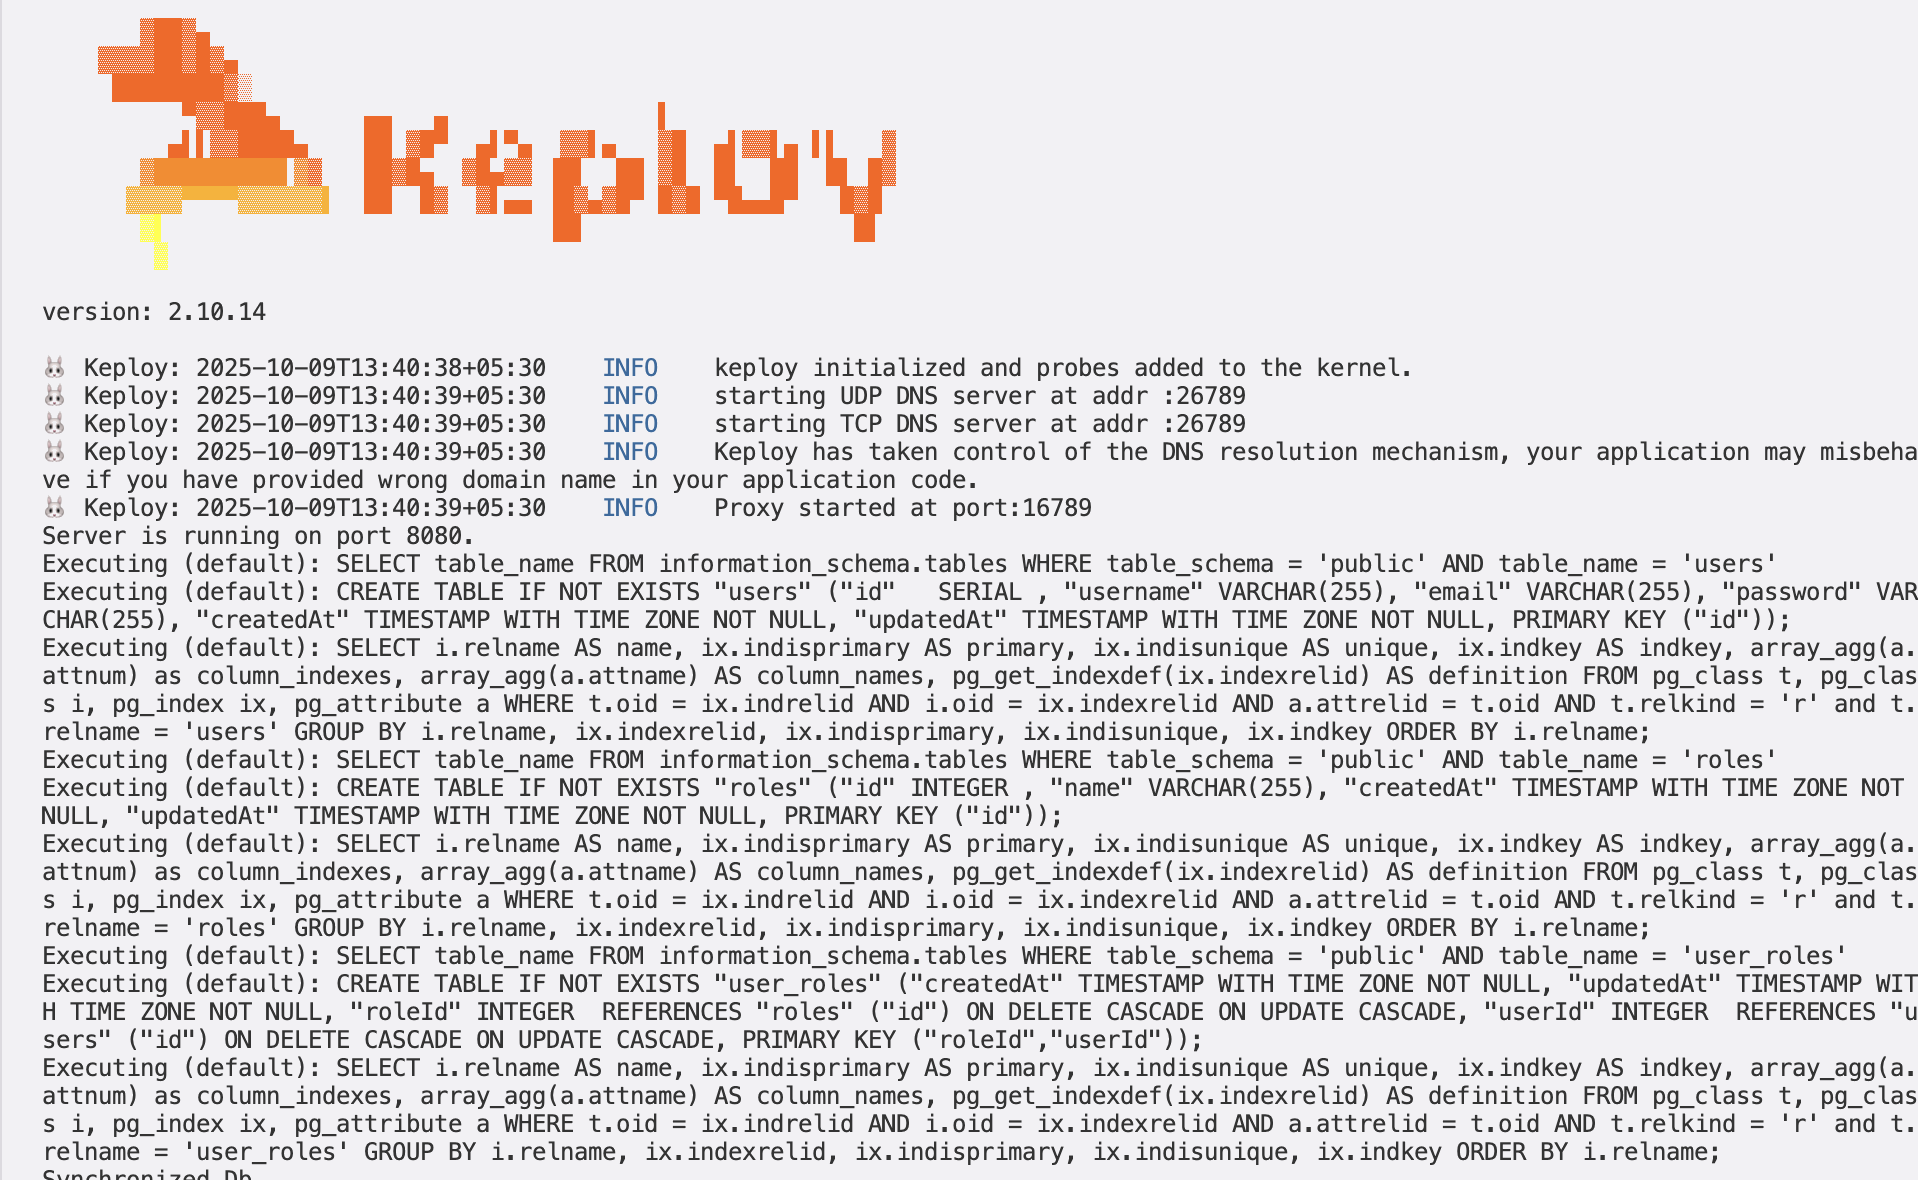
Make API Calls using Postman or cURL command. Keploy with capture those calls to generate the test-suites containing testcases and data mocks.
- Create User
curl --location 'http://localhost:8080/api/auth/signup' \
--header 'Content-Type: application/json' \
--data-raw '{
    "username":"user",
    "email":"user@keploy.io",
    "password":"1234"
}'
we will get the output:
{"message": "User was registered successfully!"}We will get the following output in our terminal
<img src="https://keploy-devrel.s3.us-west-2.amazonaws.com/keploy-jwt-capture.png" alt="Sample Keploy Test Result Node JWT" width="100%" style={{ borderRadius: '5px' }} />
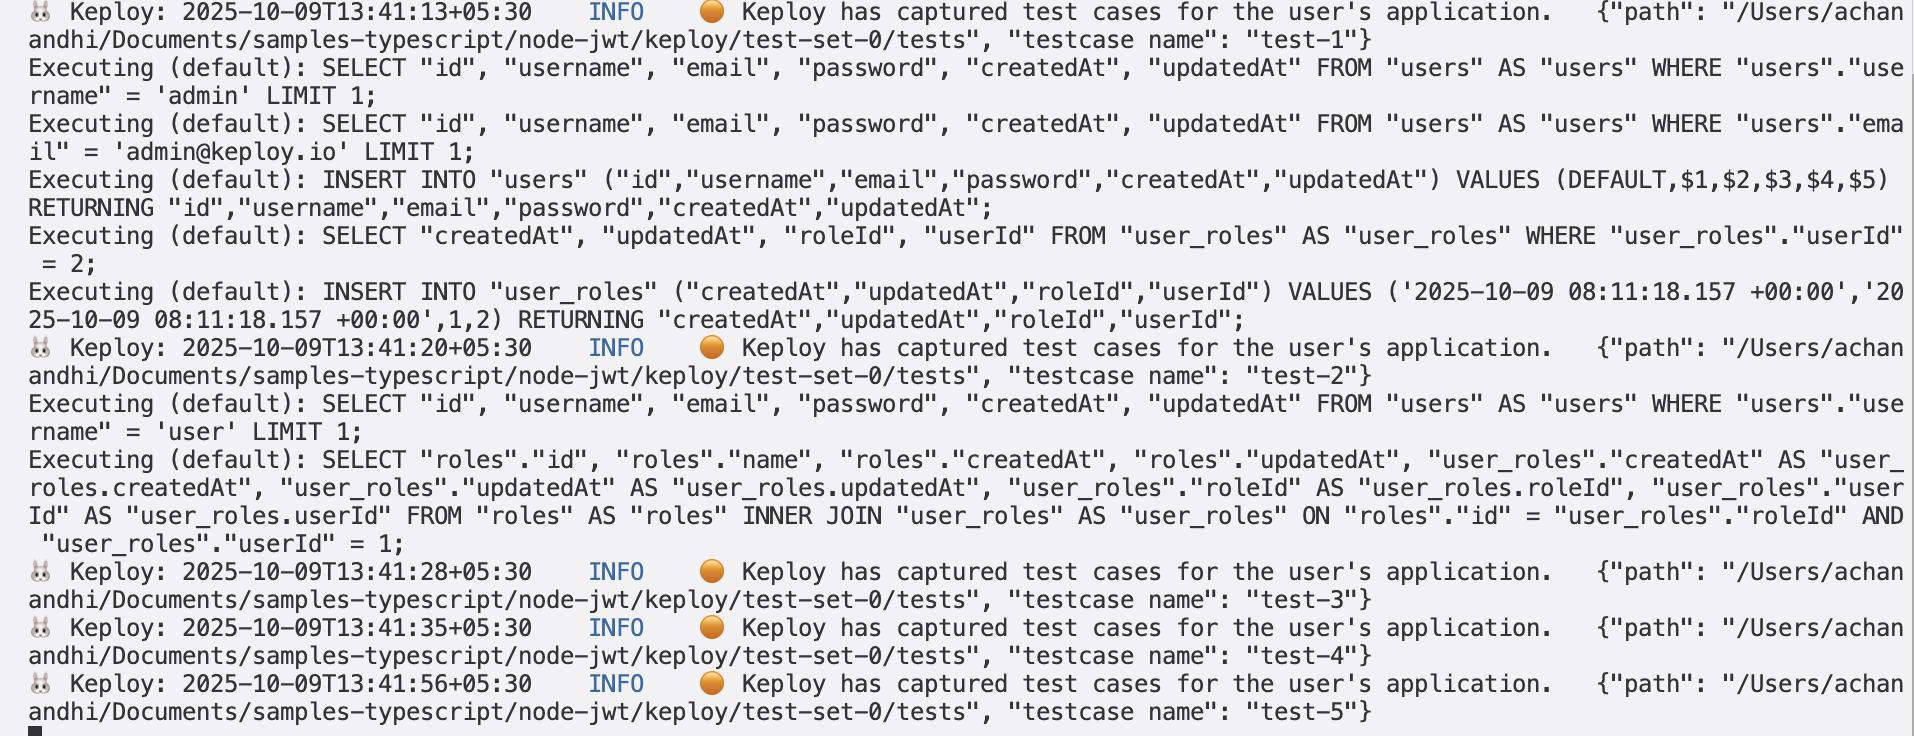
Let's go ahead create few more testcases for different endpoints!
- Create Admin User
curl --location 'http://localhost:8080/api/auth/signup' \
--header 'Content-Type: application/json' \
--data-raw '{
    "username":"admin",
    "email":"admin@keploy.io",
    "password":"1234",
    "role":["admin"]
}'
we will get the output:
{"message": "User was registered successfully!"}- User Signin
curl --location 'http://localhost:8080/api/auth/signin' \
--header 'Content-Type: application/json' \
--data-raw '{
    "username":"user",
    "email":"user@keploy.io",
    "password":"1234"
}'
We will get access token once the user has signed in:
{
  "id": 1,
  "username": "user",
  "email": "user@keploy.io",
  "roles": ["ROLE_USER"],
  "accessToken": "eyJhbGciOiJIUzI1NiIsInR5cCI6IkpXVCJ9.eyJpZCI6MSwiaWF0IjoxNzEzNzY0ODY1LCJleHAiOjE3MTM3NjUwNDV9.5LSU1A1jxIbIQFS6Tq26ENNWZBinFt2cJQZ7swpipbc"
}- Access user Content
curl --location 'http://localhost:8080/api/test/all'We will get:
Public Content
- Access user Content
curl --location 'http://localhost:8080/api/test/user' \
--header 'x-access-token: <TOKEN>'
We will get
User Content
sudo -E env PATH=$PATH keploy test -c 'npm run app.js' --delay 10Our testcases will fail as the token would expire and new Token will generated again when we are using testmode. To make sure that testcases do not fail, we have use timeFreezing. Our testcases will fail as the token would expire and new Token will generated again when we are using testmode. To make sure that testcases do not fail, we have use timeFreezing.
<img src="https://keploy-devrel.s3.us-west-2.amazonaws.com/keploy-jwt-test-1.png" alt="Sample Keploy Test Result Node JWT" width="100%" style={{ borderRadius: '5px' }} />
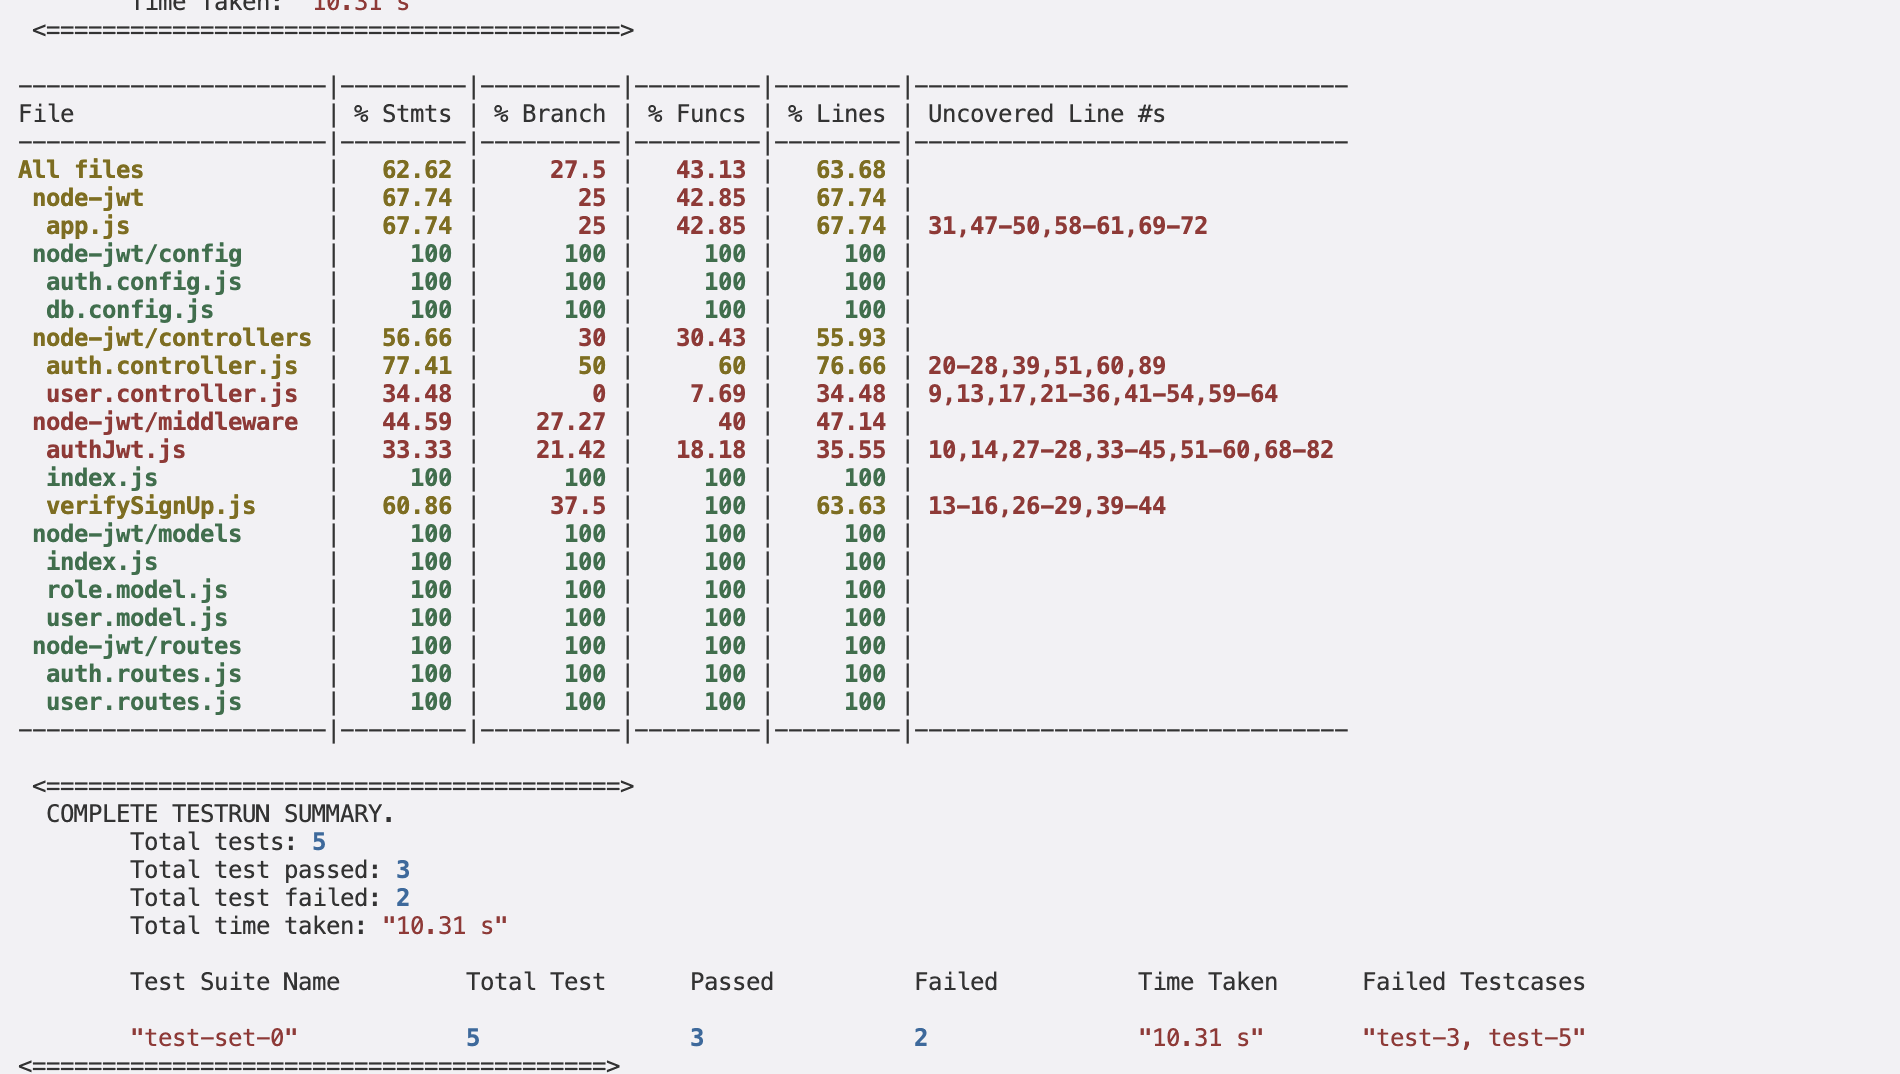
But for this application, the Token expiration is 10 mins so let's go ahead and test the application within 10 mins. Let's add the Etag and accessToken as the noise in the keploy.yml on line 21 under globalNoise. The file would look like:-
  globalNoise:
          global: {}
          test-sets:
            test-set-0:
              body:
                accessToken: []
              header:
                Etag: []
                Date: []
Now, let's run the keploy in test mode again:-
<img src="https://keploy-devrel.s3.us-west-2.amazonaws.com/keploy-jwt-test-2.png" alt="Sample Keploy Test Result Node JWT" width="100%" style={{ borderRadius: '5px' }} />
But wait — one test is still failing due to the time-freezing. To try out the time-freezing feature, you can use Keploy Enterprise.
Congrats on the journey so far! You've seen Keploy's power, flexed your coding muscles, and had a bit of fun too! Now, go out there and keep exploring, innovating, and creating! Remember, with the right tools and a sprinkle of fun, anything's possible.😊🚀
Happy coding! ✨👩💻👨💻✨
A simple sample CRUD application to test using Keploy build with Node, JWT and Postgres. Buckle up, it's gonna be a fun ride! 🎢
Clone the repository and move to express-mongo folder
git clone https://github.com/keploy/samples-typescript && cd samples-typescript/node-jwt

# Install the dependencies
npm install
We will be using Docker compose to run the application as well as Postgres on Docker container.
Since we have setup our sample-app using docker, we need to update the postgres host on line 2, in config/db.config.js, from localhost to postgres.
We will run the keploy in record mode with docker-compose to start our application:-
keploy record -c "docker compose up" --container-name "jwtSqlApp"<img src="https://keploy-devrel.s3.us-west-2.amazonaws.com/keploy-docker-jwt-record.png" alt="Sample Keploy Test Result Node JWT" width="100%" style={{ borderRadius: '5px' }} />
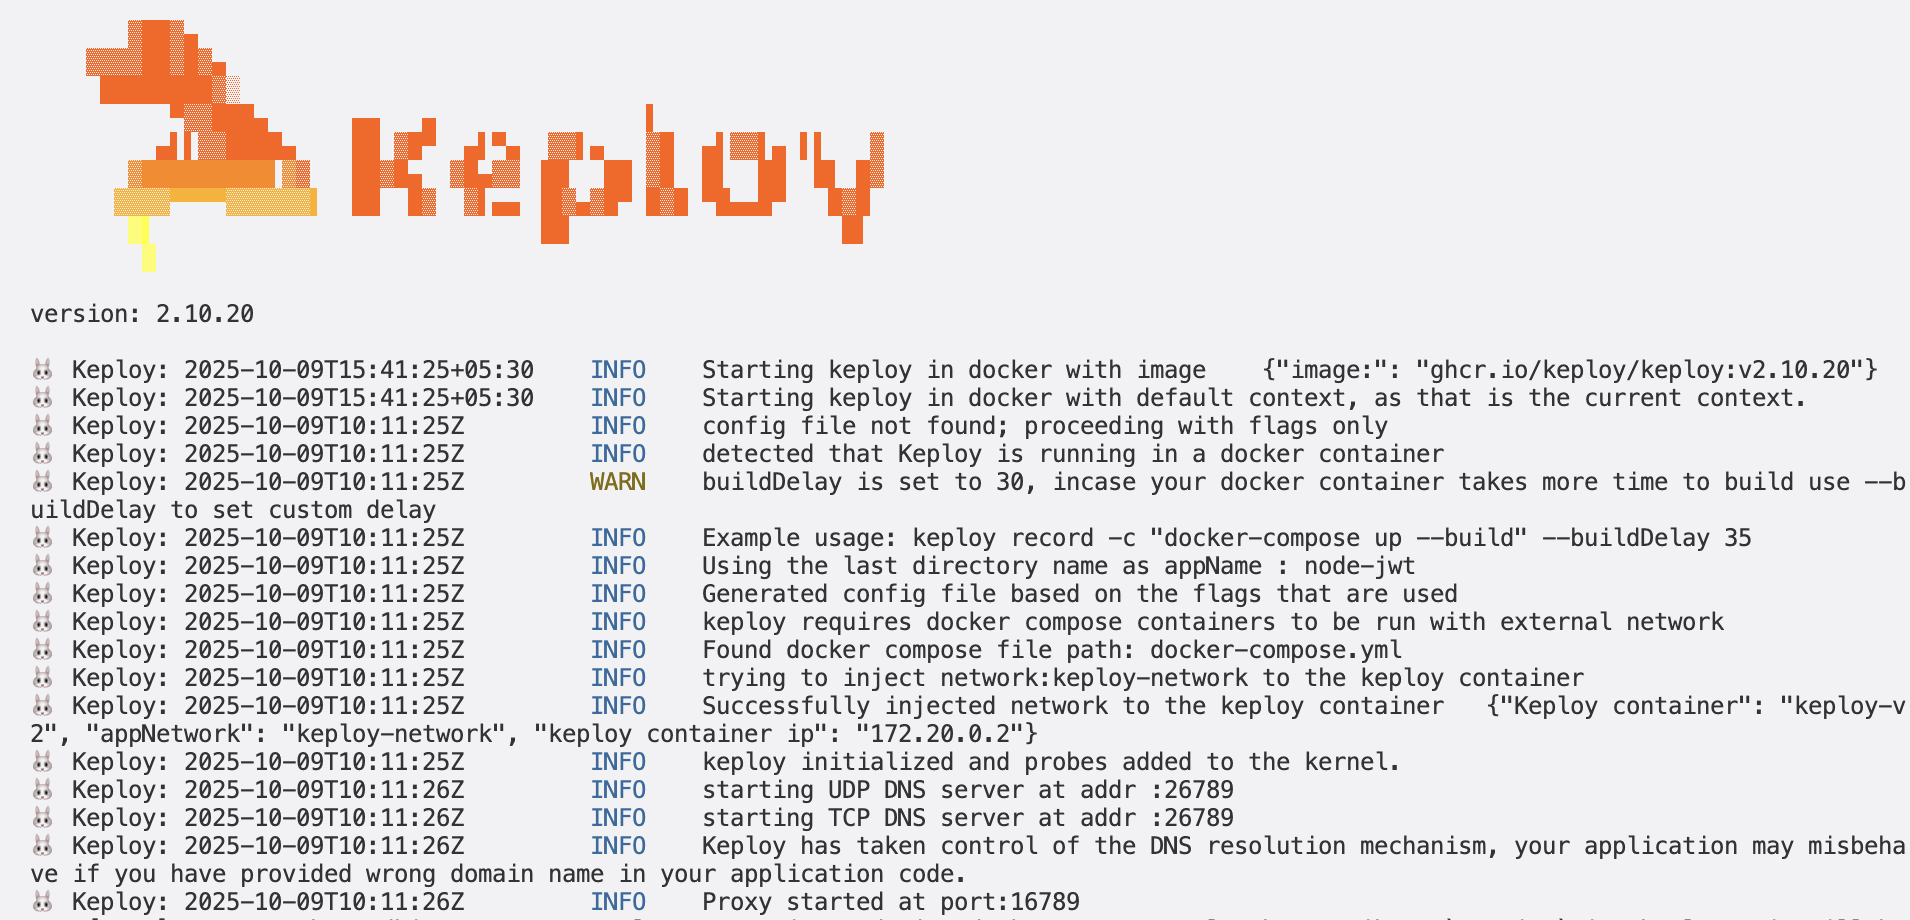
Make API Calls using cURL command. Keploy with capture those calls to generate the test-suites containing testcases and data mocks.
- Create User
curl --location 'http://localhost:8080/api/auth/signup' \
--header 'Content-Type: application/json' \
--data-raw '{
    "username":"user",
    "email":"user@keploy.io",
    "password":"1234"
}'
we will get the output:
{"message": "User was registered successfully!"}We will get the following output in our terminal
<img src="https://keploy-devrel.s3.us-west-2.amazonaws.com/keploy-jwt-capture.png" alt="Sample Keploy Test Result Node JWT" width="100%" style={{ borderRadius: '5px' }} />
Let's go ahead create few more testcases for different endpoints!
- Create Admin User
curl --location 'http://localhost:8080/api/auth/signup' \
--header 'Content-Type: application/json' \
--data-raw '{
    "username":"admin",
    "email":"admin@keploy.io",
    "password":"1234",
    "role":["admin"]
}'
we will get the output:
{"message": "User was registered successfully!"}- User Signin
curl --location 'http://localhost:8080/api/auth/signin' \
--header 'Content-Type: application/json' \
--data-raw '{
    "username":"user",
    "email":"user@keploy.io",
    "password":"1234"
}'
We will get access token once the user has signed in:
{
  "id": 1,
  "username": "user",
  "email": "user@keploy.io",
  "roles": ["ROLE_USER"],
  "accessToken": "eyJhbGciOiJIUzI1NiIsInR5cCI6IkpXVCJ9.eyJpZCI6MSwiaWF0IjoxNzEzNzY0ODY1LCJleHAiOjE3MTM3NjUwNDV9.5LSU1A1jxIbIQFS6Tq26ENNWZBinFt2cJQZ7swpipbc"
}- Access user Content
curl --location 'http://localhost:8080/api/test/all'We will get:
Public Content
- Access user Content
curl --location 'http://localhost:8080/api/test/user' \
--header 'x-access-token: <TOKEN>'
We will get
User Content
keploy test -c 'sudo docker compose up' --container-name "jwtSqlApp" --delay 10Our testcases will fail as the token would expire and new Token will generated again when we are using testmode. To make sure that testcases do not fail, we have use timeFreezing.
<img src="https://keploy-devrel.s3.us-west-2.amazonaws.com/keploy-docker-jwt-output-1.png" alt="Sample Keploy Test Result Node JWT" width="100%" style={{ borderRadius: '5px' }} />
But for this application, the Token expiration is 10 mins so let's go ahead and test the application within 10 mins. Let's add the Etag and accessToken as the noise in the keploy.yml on line 21 under globalNoise. The file would look like:-
  globalNoise:
          global: {}
          test-sets:
            test-set-0:
              body:
                accessToken: []
              header:
                Etag: []
                Date: []
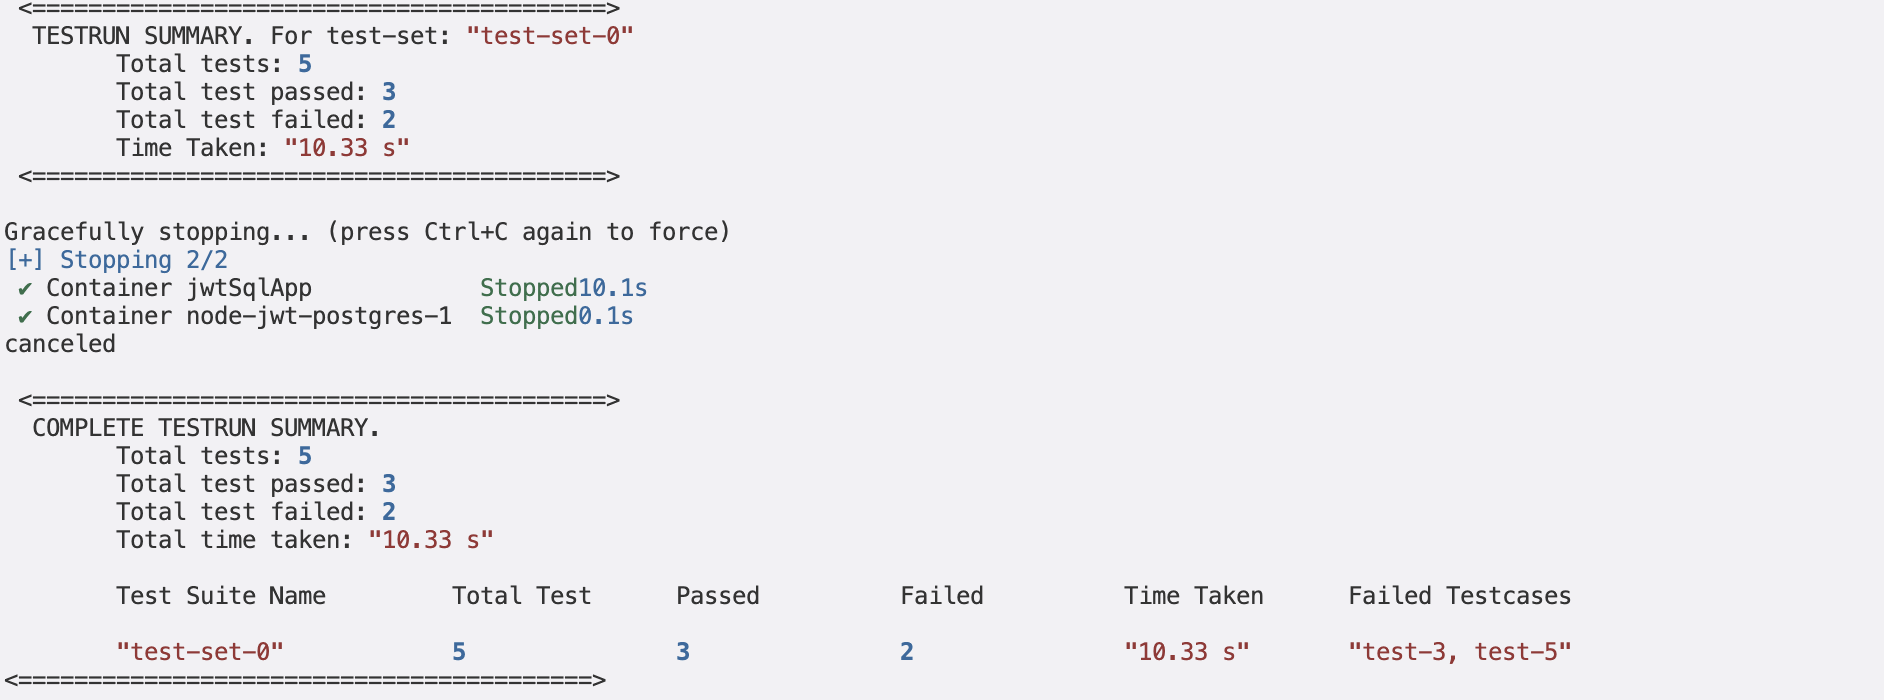
Now, let's run the keploy in test mode again:-
<img src="https://keploy-devrel.s3.us-west-2.amazonaws.com/keploy-docker-jwt-output-2.png" alt="Sample Keploy Test Result Node JWT" width="100%" style={{ borderRadius: '5px' }} />
But wait — one test is still failing due to the time-freezing. To try out the time-freezing feature, you can use Keploy Enterprise.
Congrats on the journey so far! You've seen Keploy's power, flexed your coding muscles, and had a bit of fun too! Now, go out there and keep exploring, innovating, and creating! Remember, with the right tools and a sprinkle of fun, anything's possible.😊🚀