Often, as a data scientist or data analyst, you will be collaborating with multiple people on the same project: you get assigned one part, a colleague gets assigned another part, and so on. Imagine that you were working on this project locally, and you uploaded the folder to a centralized location regularly. If you aren't very careful, it would be easy for someone making changes to their section of the project to overwrite changes someone else had made when this centralized file was updated.
Version control systems solve this problem. These systems will "merge" changes together intelligently, enabling multiple developers to work on a project at the same time. While there are few distributed version control systems, including Mercurial, Bazzar, and Git, Git is by far the most popular.
In this mission, you start learning and using Git. Git is a command-line tool we can access by typing git in the shell. The first step in using Git is to initialize a folder as a repository, which tracks multiple versions of the files in the folder, enabling collaboration.
If you have heard of or used GitHub regularly, Github provides hosting for software development version control software using Git. Since GitHub uses Git, Git is paramount to learning as a data scientist. Not only will it assist you in a work setting, but it'll aid you as you build a portfolio and establish your online presence.
Before you start using Git, you have to make it available on your computer. Even if it’s already installed, it’s probably a good idea to update to the latest version.
Git Guides - install git · GitHub to find the documentation on installing git on windows, MacOS, Linux. Download and install git by following the instructions diligently.
To begin to use git, you need to create a github account. If you already have a github account, feel free to skip this. To create a github account you need a unique username, email, and a password. The username and password would be needed in subsequent sign in, so try not to lose them. Click the link below to create a new account.
Before you launch Git, you need a little bit of setup first. You will probably do this only once since all the setup is stored on an external global file, meaning that all your projects will share the same configs. There is also a way to configure projects one by one, but we will consider this later.
Since Git is a distributed Version Control System, you will one day need to connect to other remote repositories. To avoid making any identity mistake, it is necessary to tell Git a bit about yourself. Don’t worry; it won’t ask a fun fact about you!
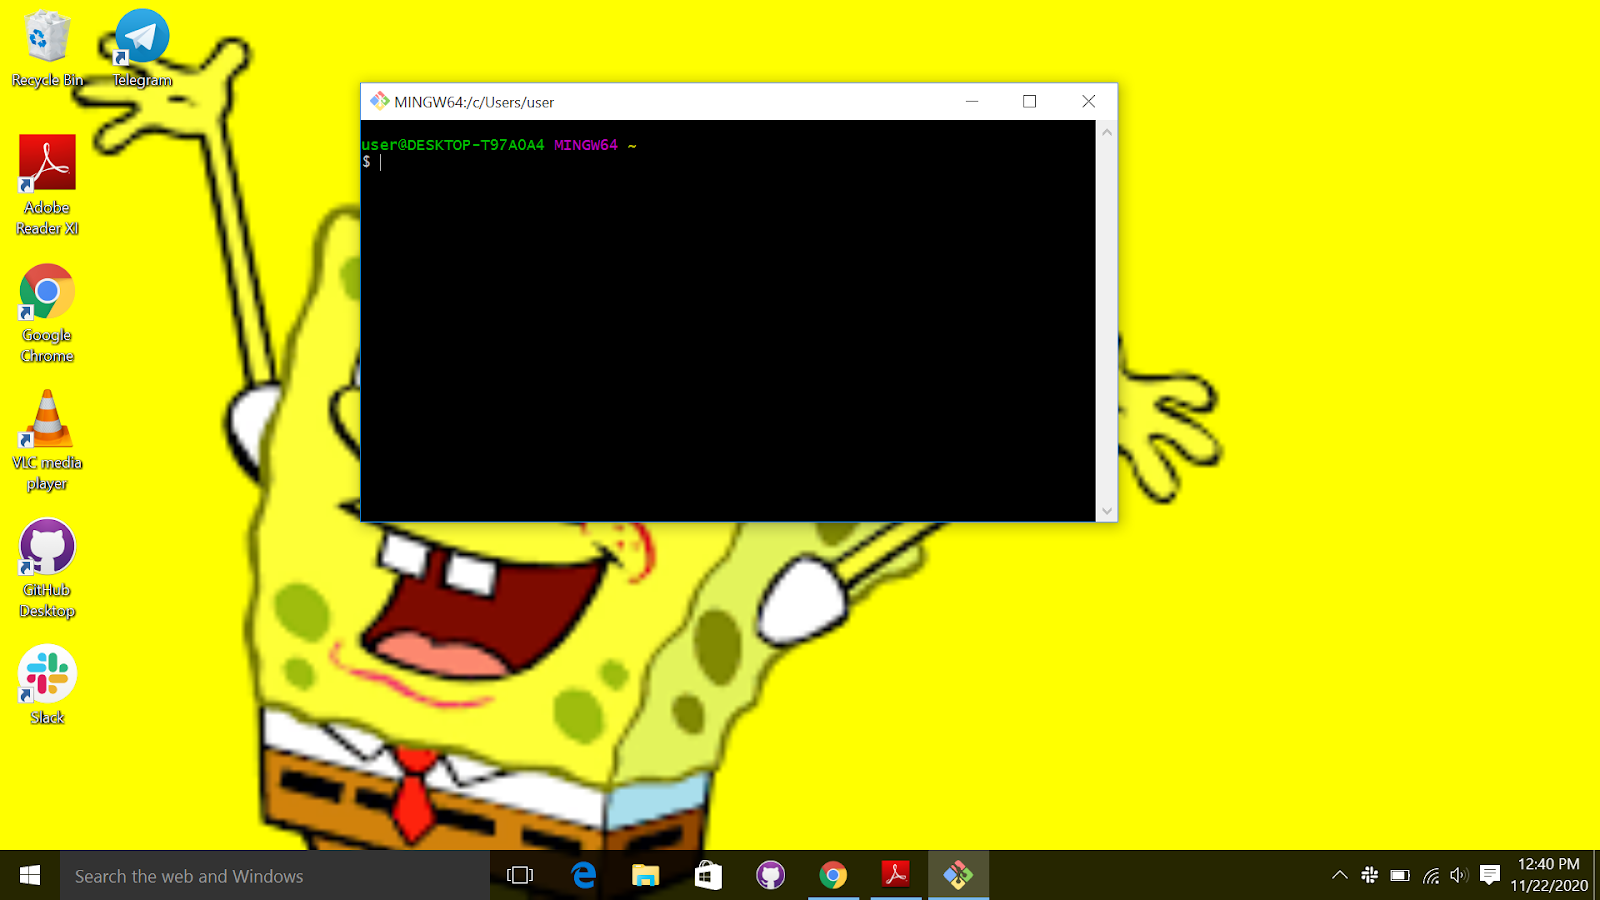
To set up Git, open “git bash" (for Windows systems) or the default console window (for Linux/MacOS or Windows systems that modified their PATH environment). In the command prompt, just tell Git your name and email address:
For windows just search and open “git bash" When you open “git bash", you should get something that looks like the image below.
Type the following code to set your username and email. Notice I used my username and email, you should change it to your own username and email.
git config --global user.name "github username "
git config global user.email "your email”
Notice the “global” argument; it means that the setup is for all future Git repositories,
so you don’t have to set this up again in the future.
Example :
git config --global user.name "yaswanthteja"
git config global user.email "y@gmail.com”
We will look at Github repositories, usually called “Git Repo.”
-
A repository is a storage where all your project and all the changes made to it are kept.
-
You can think of it as a “change database.” This is no cause for worry; it is only a typical folder on your system, it is therefore very easy to manipulate.
-
For each project you want to manage with Git, you have to set up a repository for it.
-
Setting up a repository is very easy. Just navigate to the folder you want to track, and tell
Git to initiate a repository there.
- Create a folder
- Navigate to the folder.
- initialize the folder as a git repository. You do this by right clicking on the empty space inside the folder and then selecting "git bash". This action will open "git bash". Run the command below to initialize an empty repository.
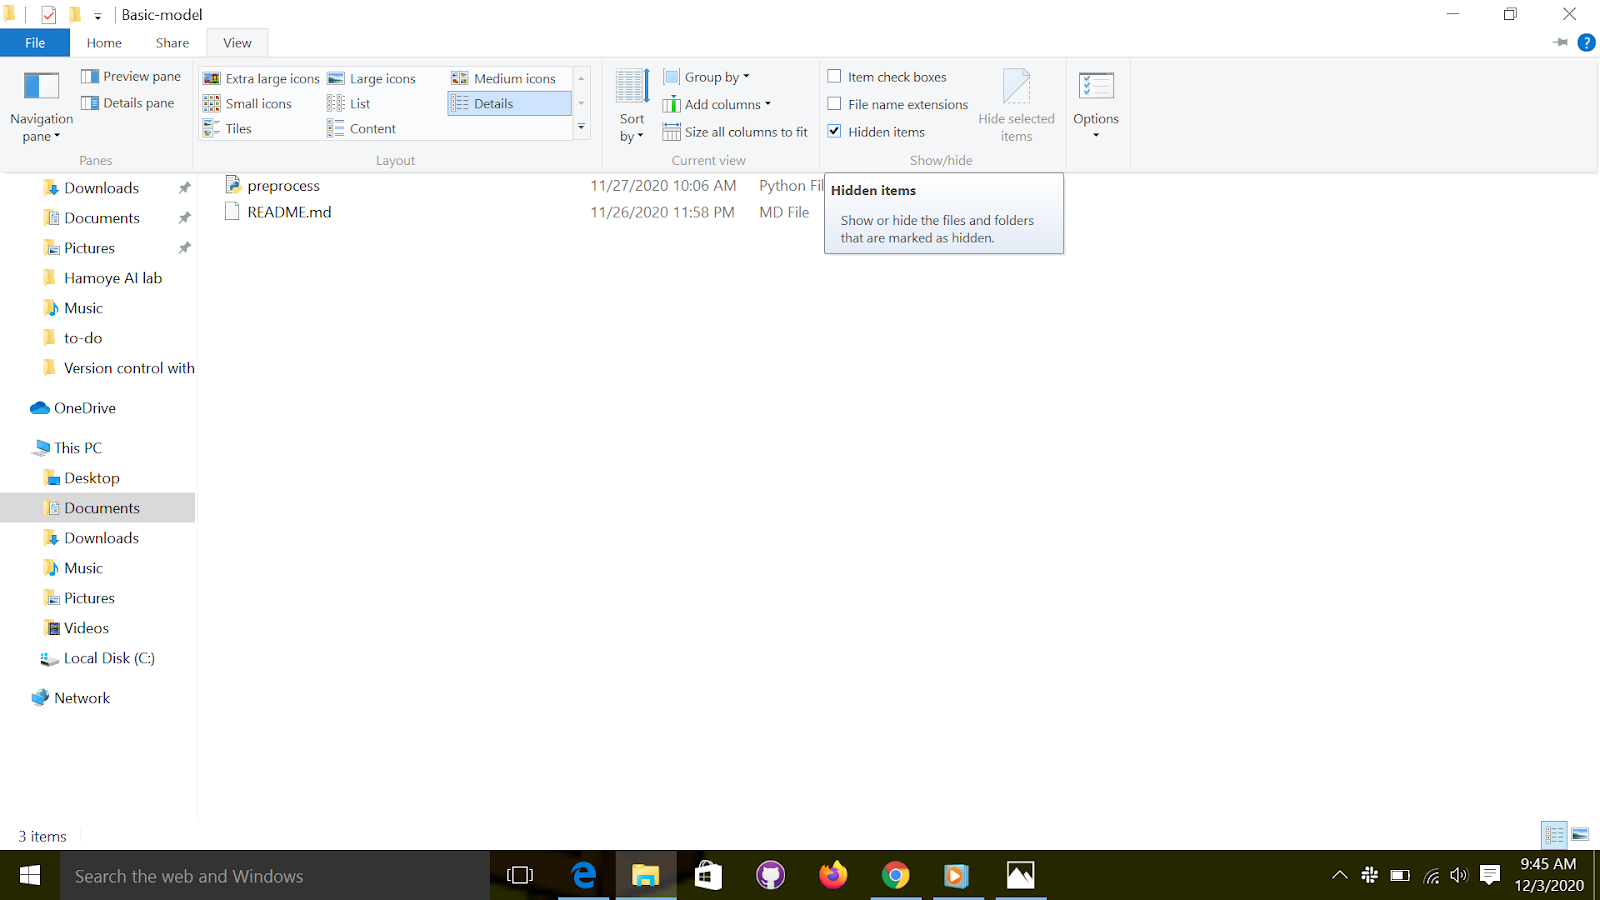
This will create a hidden folder git, to see this hidden folder on "windows" you go to “view” on the folder and check the hidden items, as shown below.
What about the empty area outside the “.git” directory? It is called the Working Directory, and the files you will be working on will be stored there. Generally, your most recent version will be on the Working Directory. Each file you work on is in the Working Directory. There is nothing particular about this place, except the fact that you will only manipulate the files here directly. Never modify the files inside the “.git” directory!
Git will detect any new file you will place in the Working Directory. You can also check the status of the directory by using the Git command “status.”
git status
Lets create a simple text file and name it “test.txt”, you can create this file using any text editor. save and exit.
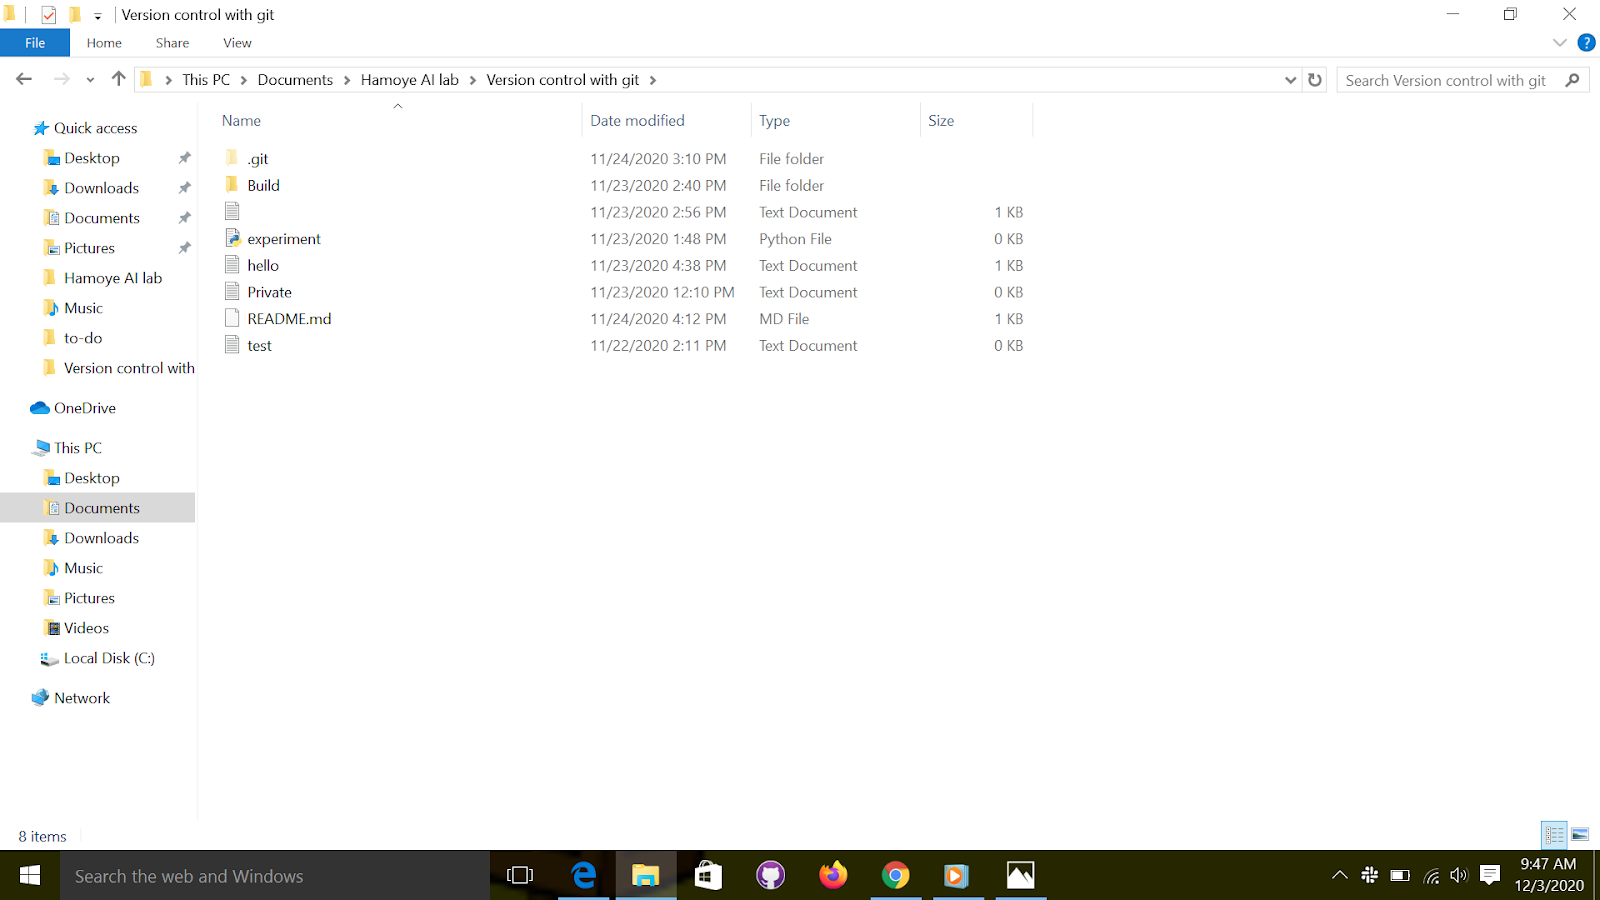
Go back to "git bash" and run the "git status" command. Notice the change, that is because git noticed that the project has changed. Make sure that you place your new file alongside the .git directory like in figure below, not into it!
The Staging Area is where your files go before the snapshots are taken. Not every file you modified on the Working Directory should be taken into account when taking a snapshot of the current state of the project. Only the files placed in the Staging Area will be snapshotted. Hence, before taking a snapshot of the project, you select which changed files to take account of. A change in a file can be creating, deleting, or editing. Think of it as designating which files get to be in the family photo. To add a file to the "Staging Area", we use the Git command “add.”
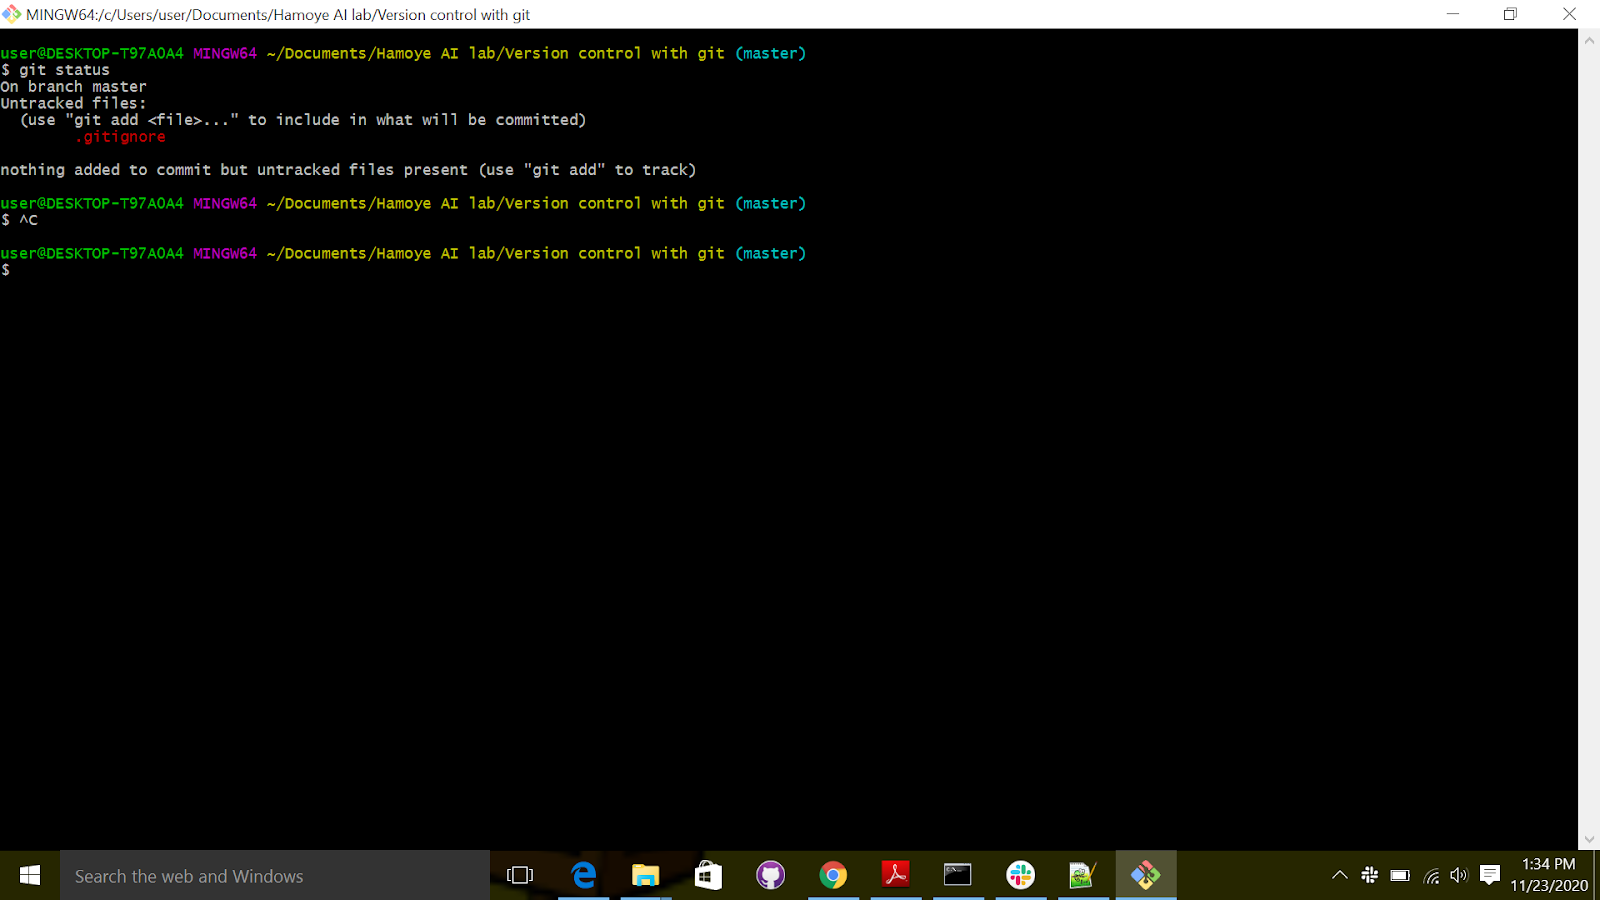
- For example when we added the “test.txt” file and ran the "git status command", we noticed this message;
Untracked files:
(use "git add ..." to include in what will be committed)
Test.txt.txt
This is telling you that you need to add the file you just created to the staging area so it can be tracked. Therefore, to add the file we go to the "git bash" and run the following command:
This will add the “test.txt” file to the staging area, or if you created multiple files, you can add them one after another or together like “git add file1 file2 file3.” Also, if you want to track all the files added, you can run the command
git add .
Let’s check the status with git status command.
git status
Adding a file to the staging area won’t produce any visible result, but checking the status will get you a result similar to this:
On branch master
No commits yet
Changes to be committed:
(use "git rm --cached ..." to unstage)
new file: test.txt
Say for example you made a mistake while staging the file, and you want to undo it, all you need to do is unstage the file.
Here is the command to unstage a file
git rm --cached test.txt
Like we talked about in the section before this one, a commit is just a snapshot of the entire project at a certain time. Git doesn’t record the individual changes done to the files, it takes a picture of the entire project. In addition to the snapshot, a commit also contains information about the “author” of the content, and the “committer” or whoever put the changeset into the repository.
-
A commit is identified by its name; a 40-character string that is obtained by hashing the commit. It is a simple “SHA1” hash so multiple commits with the same information will have the same name.
-
A reference to a specific commit is called “head,” and it also has a name. Also, the head you are currently working on is called “HEAD”. We can now commit the files we staged earlier. Before each commit, you should check the status of the Working Directory and the Staging Area. If all the files you want to commit are in the Staging Area (under the phrase “Changes to be committed”), you can commit. If not, you have to stage them with “git add.”
-
To commit all the changes we made, we use “git commit.” This will take a snapshot of our current state of the project.
git commit -m “initial commit”
-
The command above will commit the changes made. Note that the “initial commit” is your commit message which could be anything. However, for the example, I used an initial commit because I want git and anybody that will access the repo to know that this is the initial commit.
-
The rule is to always use messages that are related to the changes made. For example, if I fixed a typo in the document, the commit message can be something like “Fixed typo in test.txt”
Not everything in the working directory should be tracked by Git. There are certain files (configs, passwords, bad code) that are generally left untracked by authors or developers. Those files (or directories) are listed in a simple file called “.gitignore.” Notice the period before “gitignore”; it’s important. To ignore files, create a file named .gitignore and list the files or folders to ignore in it.
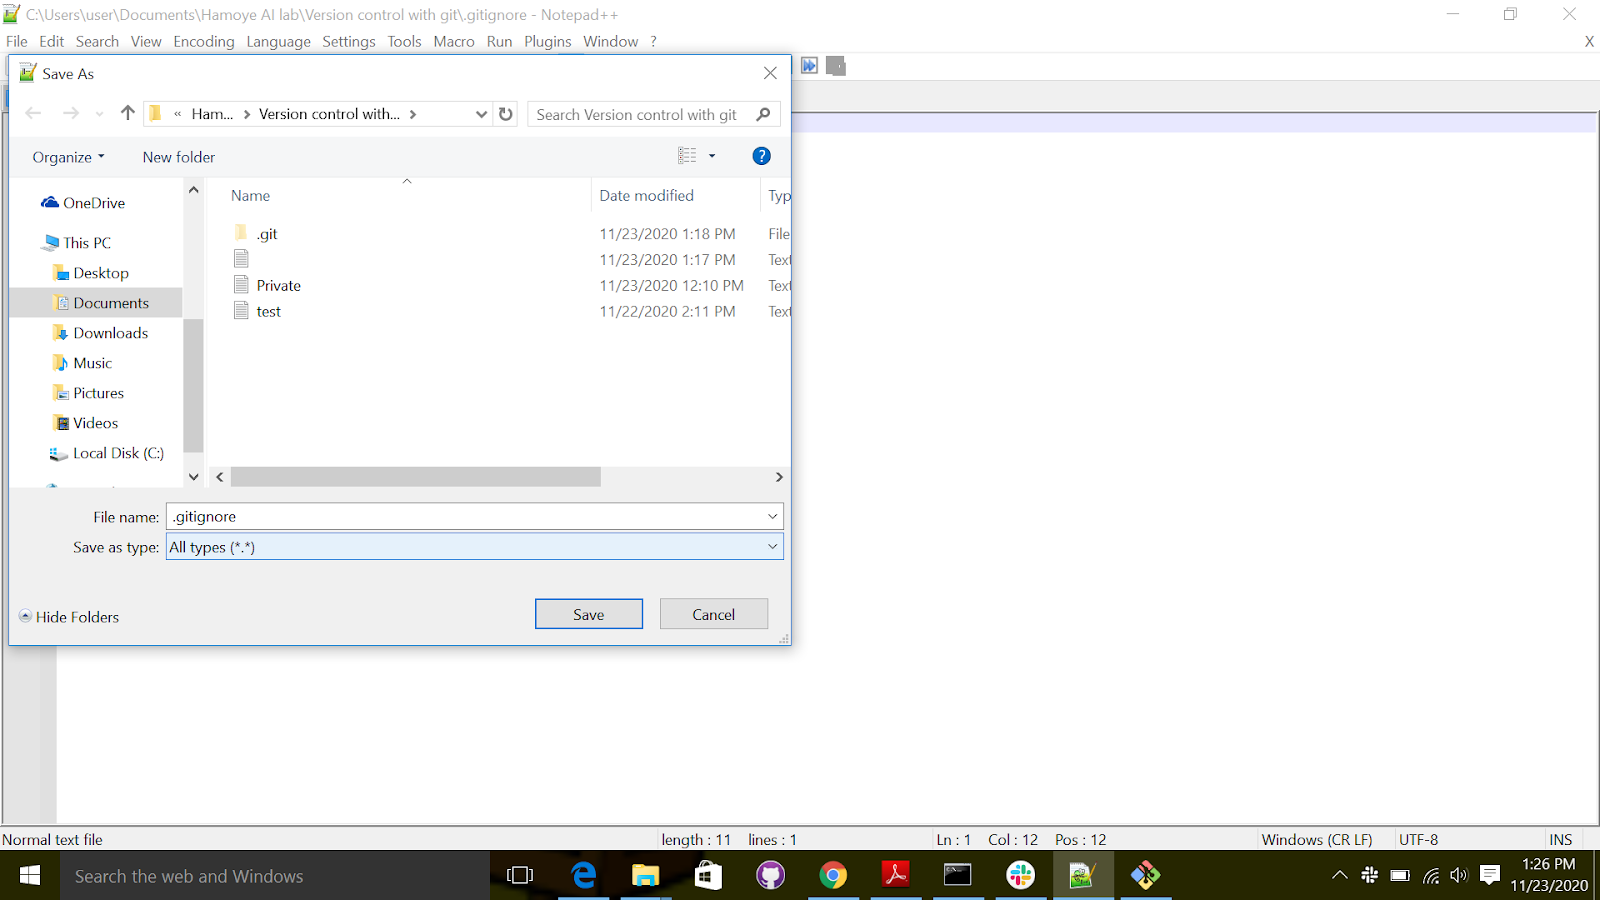
Let’s get back to our repository. Imagine that you want to include a private, untracked file named Private.txt. You first have to create the .gitignore file using your favorite text editor and then write Private.txt.
How to create a .gitignore file on windows
- Open notepad or notepad++ or any text editor available. 2.Type in the name of the file you want git to ignore e.g Private.txt.
- Save file as; filename : .gitignore, save as type: all text
After saving the file, let's open the "git bash" to check the status. Note that if you want to open "git bash", click on the empty space on the folder. Once inside the folder, select "git bash" here.
 As you can see on the status shown in image above, Private.txt is not tracked. You can also see that the .gitignore file is tracked; you will therefore have to add and commit it after you modify it. We simply use the git add and git commands.
git add .gitignore
git commit -m "Added gitignore"
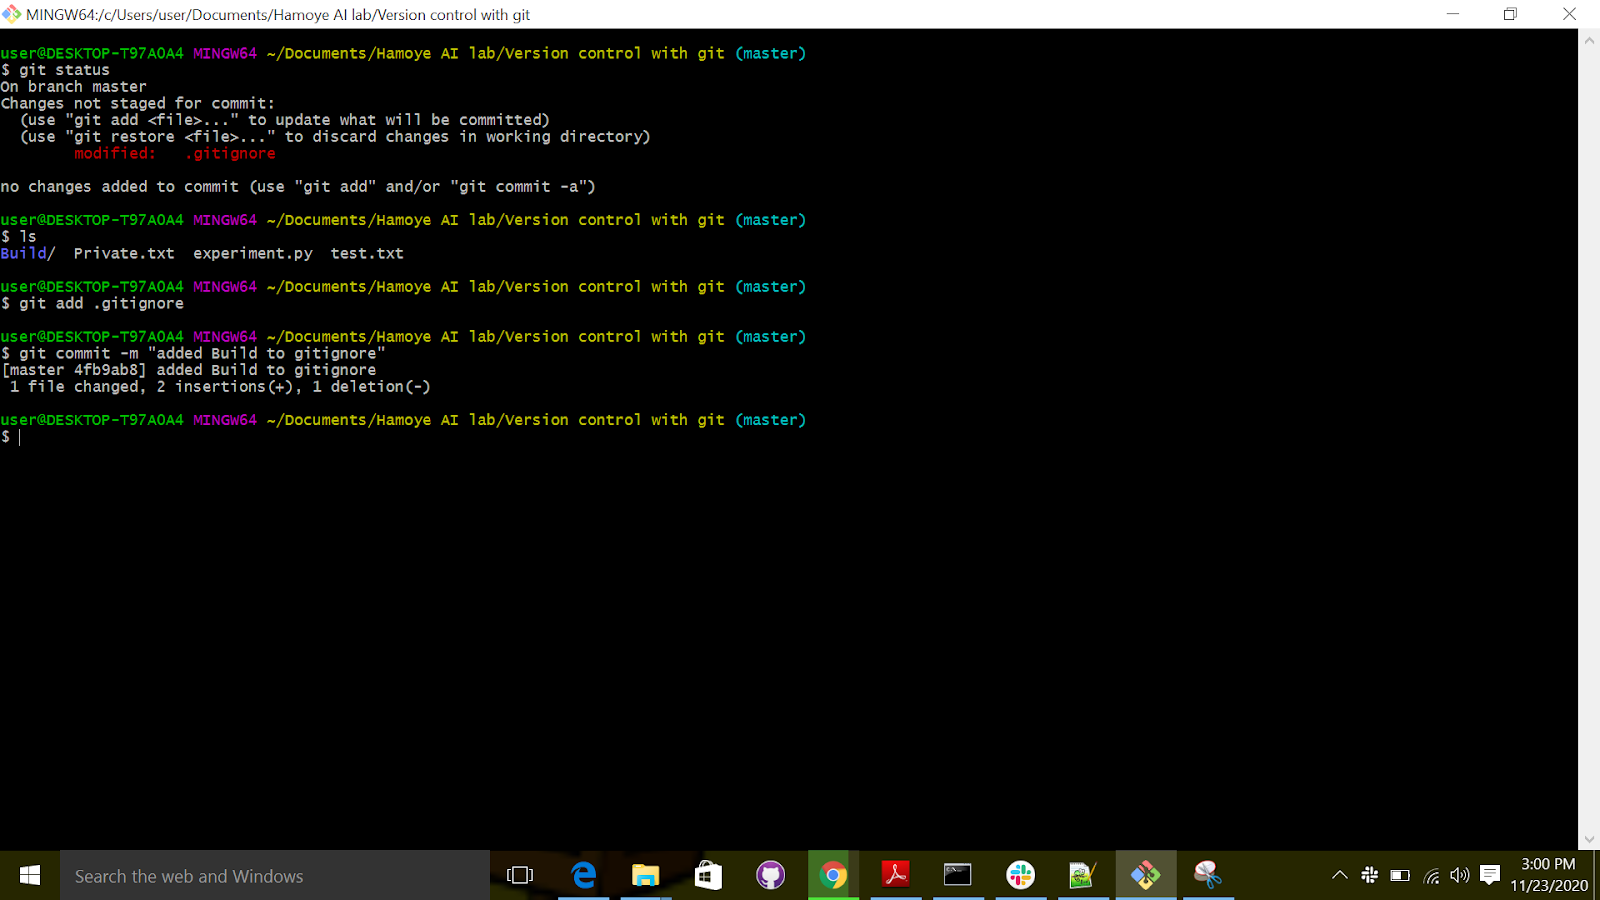
As always, staging a file and then committing the project will result in a confirmation message summarizing the changes done.
[master a7c3285] Added gitignore
1 file changed, 1 insertion(+)
create mode 100644 .gitignore
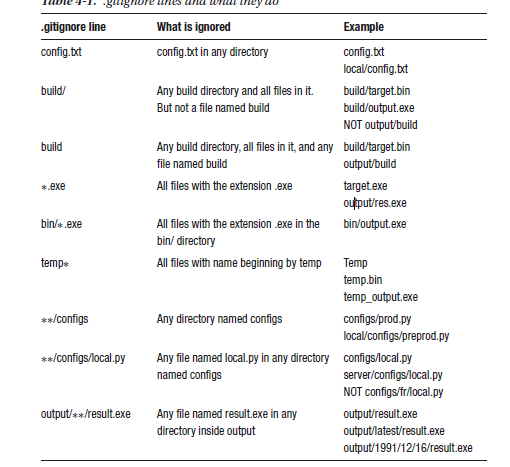
Remember that the “.gitignore” global file should be placed at the root of your repository. If you put it in a directory, only the matching files in that directory will be ignored. Generally, having multiple “.gitignore” files in multiple directories is considered as a bad move unless your project is enormous. Prefer listing them into a single .gitignore file placed at the root of your repository. The .gitignore file doesn’t only ignore files listed by name; you can also ignore directories and files matching a description. You will find in theTable below, a handy reminder of all the templates you can use.
That’s how you ignore files! It’s almost as easy as ignoring your responsibilities!
Notwithstanding, remember: the .gitignore file is tracked and versioned, so don’t forget to stage it before committing!
Let's look at another example:
1.create a folder and name it Build. 2.Add Build to the gitignore file. 3.Git status to check the status, make sure the build folder is not tracked 4.Git add .gitignore commit 5.Check status
Take your repository from the previous exercise and create multiple files and directories. Check Table 4-1 and try to ignore the files that you created using each line. Create as many files as you need, and don’t stop until you understand each pattern. No need to remember everything, but you should at least have an idea of when they should be used.
If you followed the exercises (as you should) or began to use Git for your own projects, you now have a little problem (that I promised would be solved easily with Git); how to consult the history log. This is one of the most used features of Git and also one of the easiest Git commands:
Try it! Open "git bash" and run the command. You should get a view like the one shown below
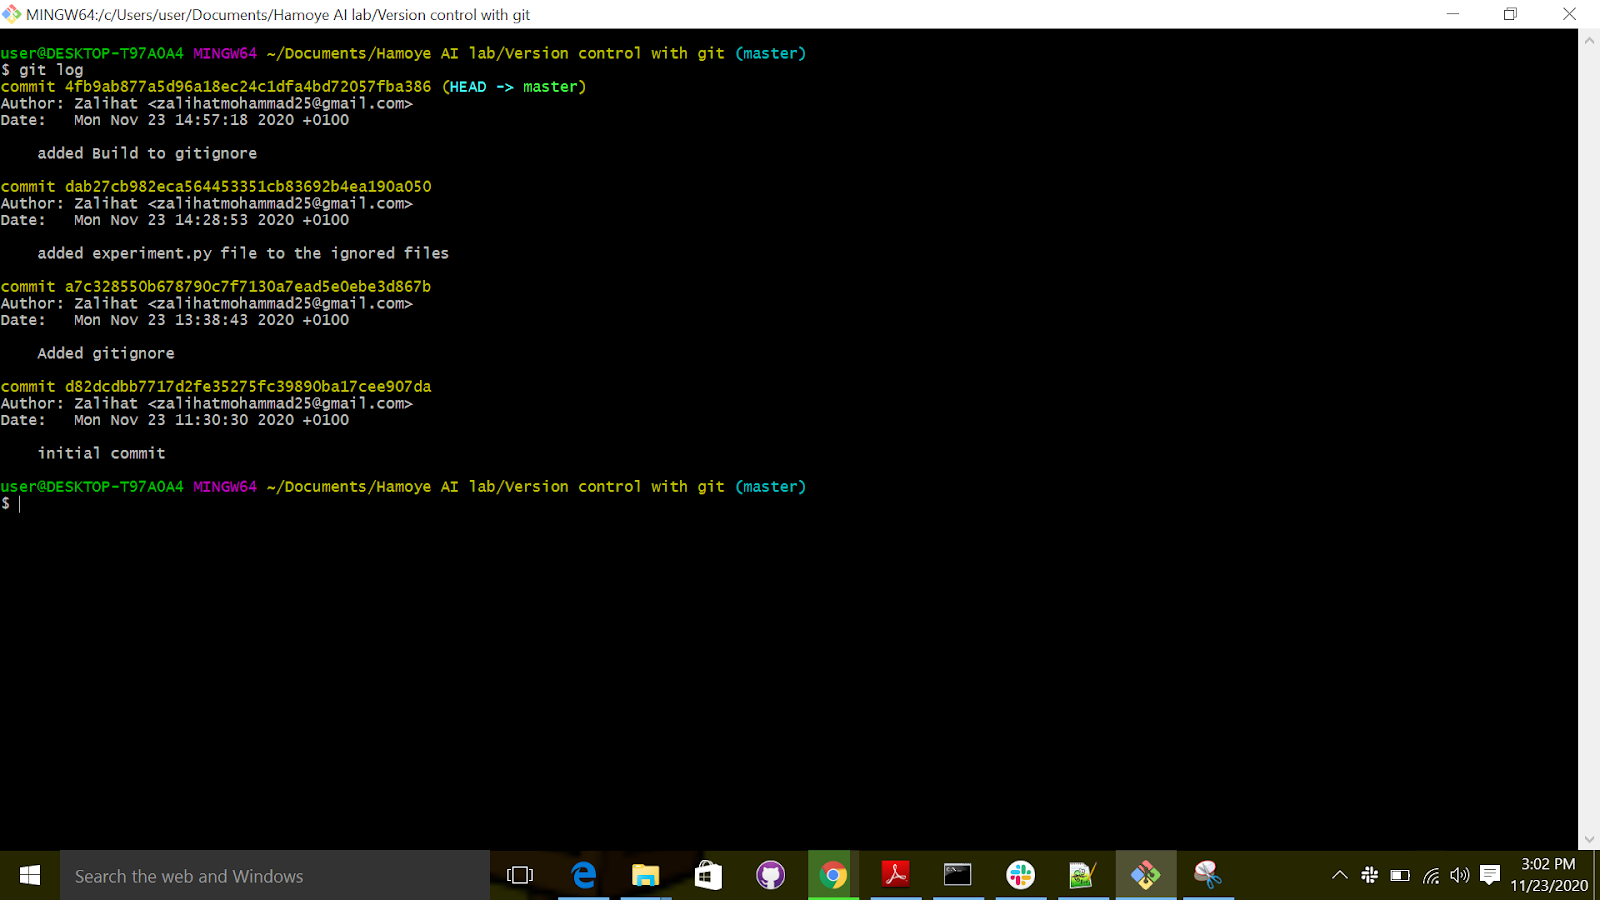
The commit log will list (from the most recent to the oldest) all the snapshots you or other people committed. It also includes, for each commit
• The name (unique, obtained by hash)
• The author
• The date
• The description
Since the commit names are too long, we will only use the first five letters as the
name. This will be important for the next section.
If your commit history is very long, you can use the keyboard and go
• Forward or backward one line: key up and down OR j and k
• Forward or backward one window: f and b
• At the end of the log: G
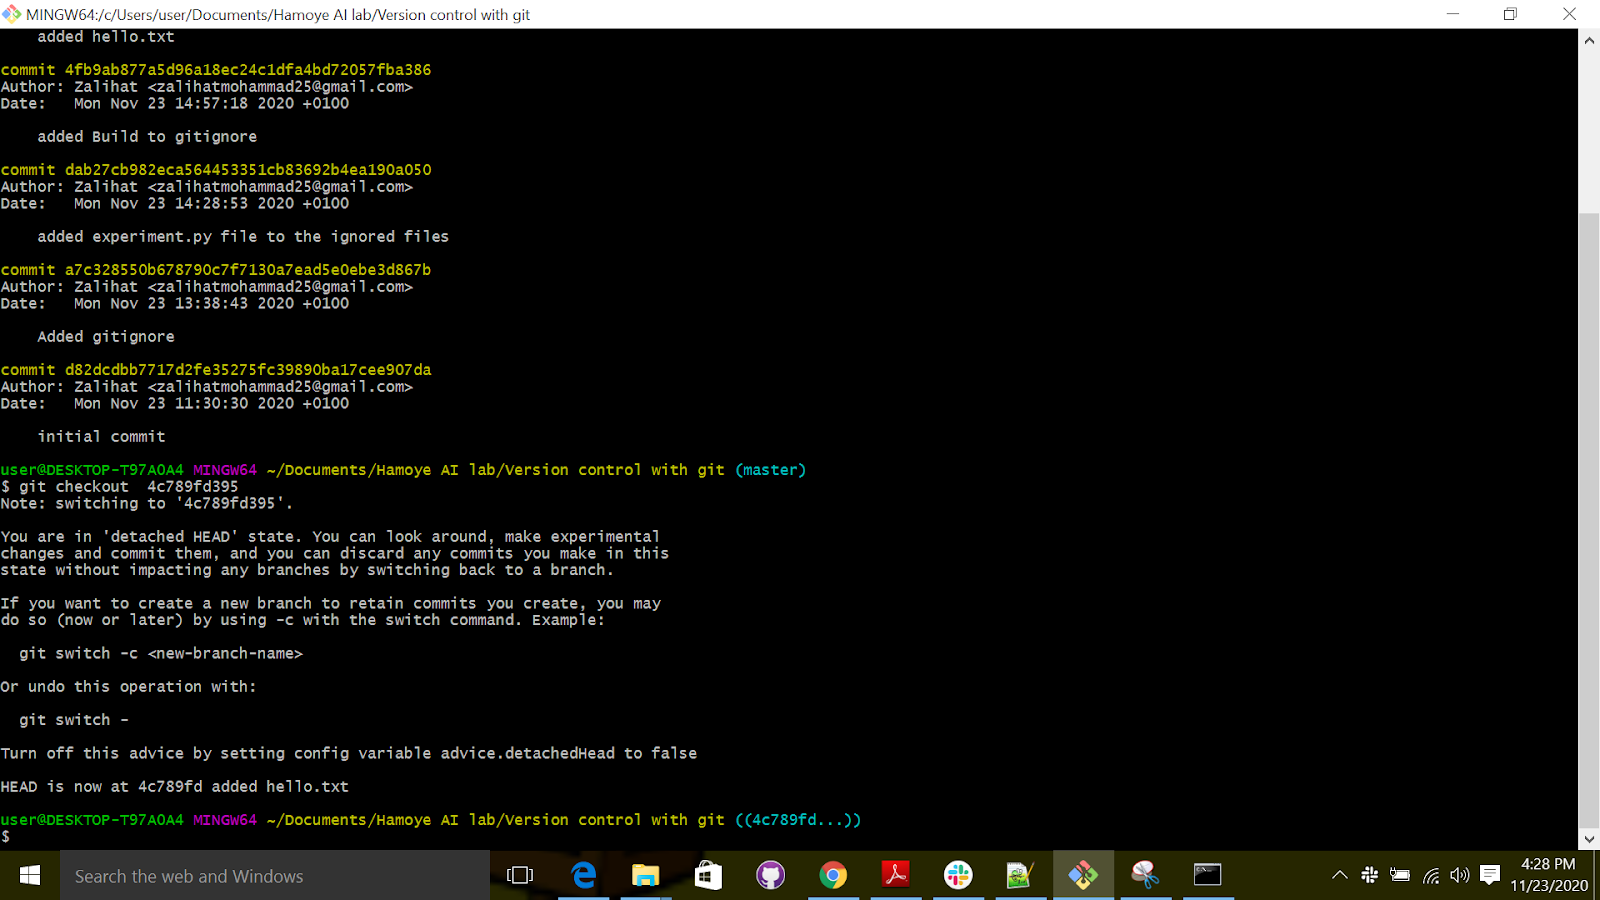
There are many parameters you can use with git log; The table below is presenting them to you.
Exercise:
This exercise is very simple. Just reopen your repository from the last exercise and check the
• In reverse order
• From yesterday
• For the last two commits
Tracked files can be in three states:
• Modified: You changed the file.
• Staged: You changed the file and prepared it to be snapshotted (git add).
• Committed: You took a snapshot of the entire project and the file was in it (git commit).
-
Many times, you will want not only to know what has changed in your project, but you also want to see what state it was in, to see the snapshot you took. It’s easy with Git.
-
When you want to bring the previous state of the project to the working directory, we have to check out the commit with “git checkout.” Since this changes the files on the working directory, you have to make sure not to have any unstaged files on there. Untracked files are fine since Git doesn’t track their states yet.
-
To check a snapshot of the project, we use the “git checkout” command, and pass the commit name as a parameter.
-
Remember the commit names we talked about earlier? We are going to use them in this section to switch between versions.
-
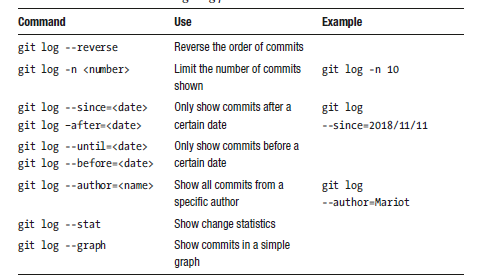
First you need to create a text file “hello.txt” , in the file write Hello world!, save and exit.
-
Open "git bash" inside the folder created earlier, use git status to check the status of the repository, git add to stage the changes and commit to commit the changes.
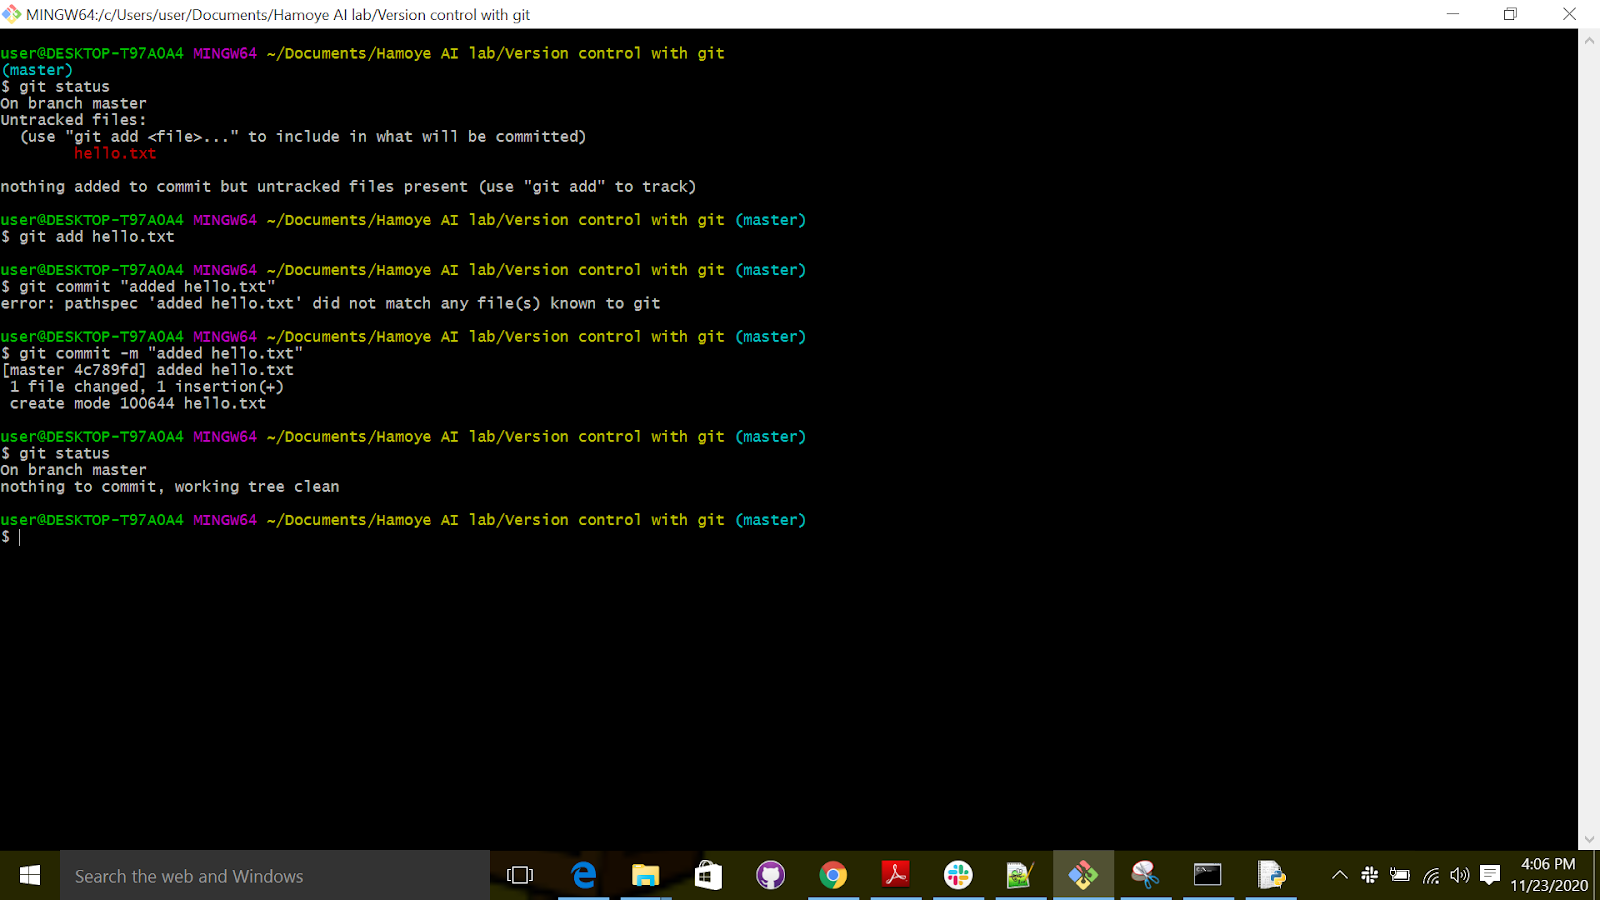
Now we want to edit the file and change the “hello world” to “Hello (add your name)” e.g Hello Zalihat.
After doing that, run “git add” to stage and “git commit” to commit the changes.
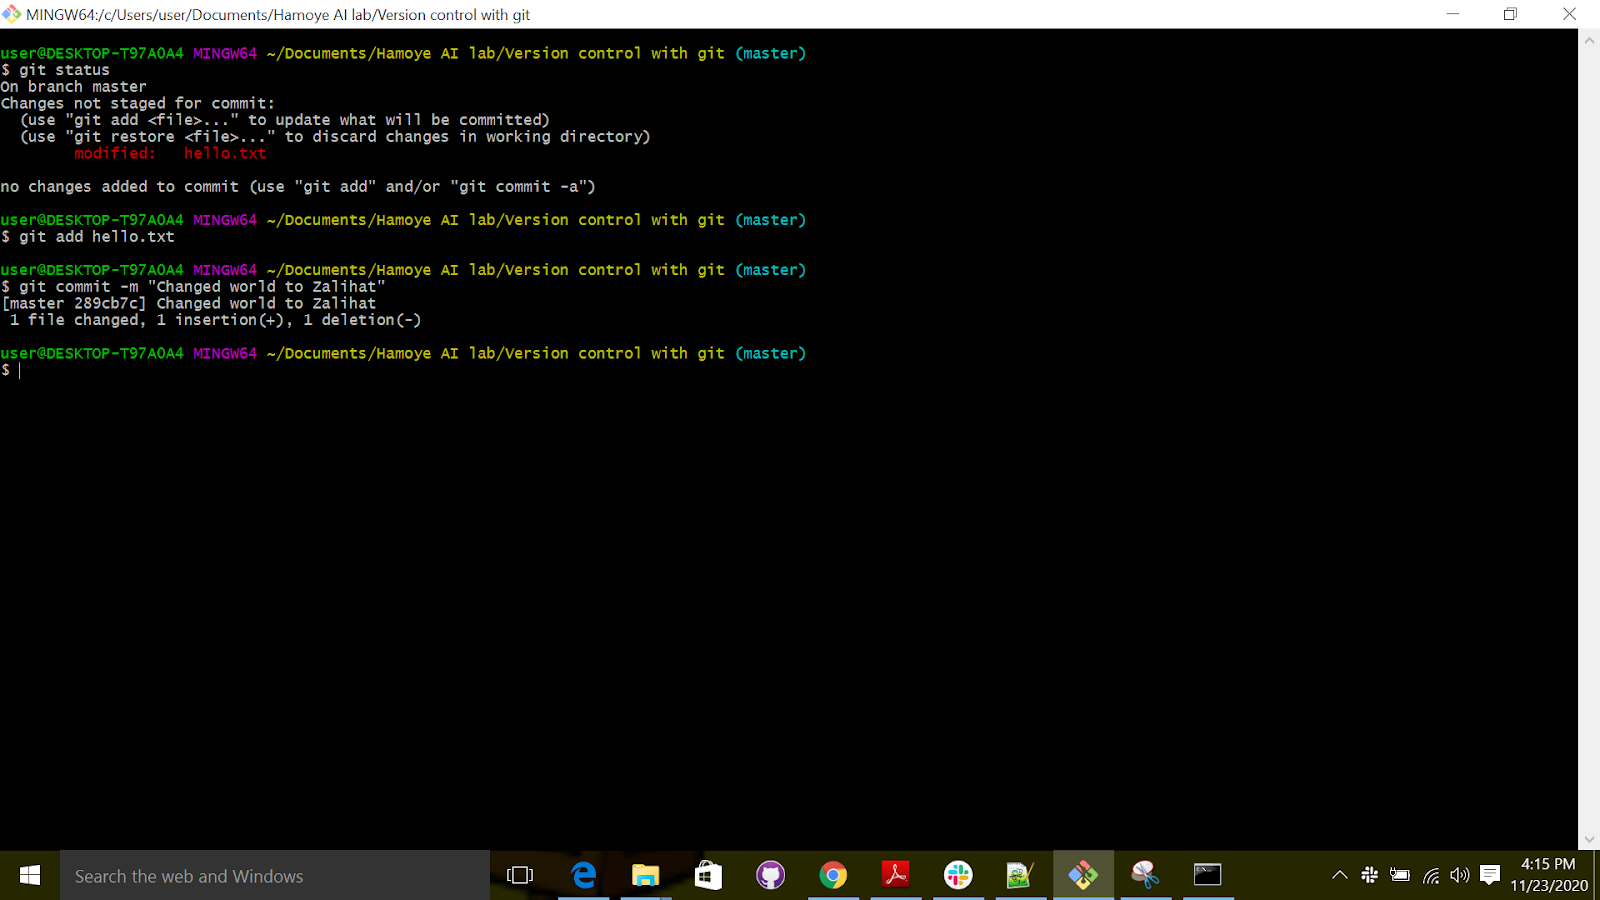
Nice, so now we want to switch to the time when the text was “hello world”.
We use checkout, followed by the commit name; to get the commit name we use the git log.
Remember you can type “clear” to clear your screen.
The question is, how do we know which commit to switch to? It's easy, just check the commit messages.
Git checkout 4fb9ab877a5d96a18ec24c1dfa4bd72057fba386
If you check your text editor, you will notice that the project is now just like it was when you took the snapshot. That is what’s best with Git. Nothing you took a snapshot of is ever lost!
Now let’s learn some Git terminology. First is “head.” “head” is just a reference to a commit. Instead of saying “name,” when talking about commits, we say “head.”
When switching between different commits, we need a way to know which “head” we are on. The current “head” (the one being checked out) is just called “HEAD.”, and that’s it! A "head" is a reference to a commit (there can be multiple "head"s in a
repository), and the “head “pointing to the currently checked-out commit is called “HEAD”.
This is especially important when you make mistakes and want to return to the previous version.