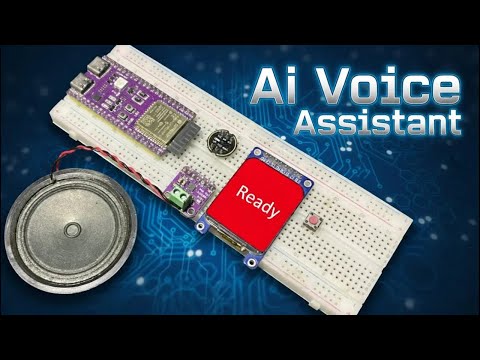
This project guides you through building your very own AI Voice Assistant using completely free tools and AI models. The ESP32-S3 development board handles voice recording and audio playback, while all the complex AI processing runs on a HuggingFace Space server.
Don't forget to Subscribe to the Channel and Like the video!
- 100% Free: No paid APIs, services, or subscriptions are required.
- HuggingFace Integration: Utilizes a custom server setup on HuggingFace to combine Speech-to-Text (STT), a Large Language Model (LLM), and Text-to-Speech (TTS).
- Hardware: Built around the powerful ESP32-S3 development board.
- Current Language: Currently supports English only. (Multi-language support is a future goal).
The use of PSRAM is critical for voice recording and processing tasks, so make sure your board has it!
| Component | Details | Note |
|---|---|---|
| Development Board | ESP32-S3 (16MB Flash, 8MB PSRAM) | |
| Display | ST7789 TFT Display | Check the separate display tutorial link in the video description for configuration. |
| Microphone | INMP441 I2S MEMS Microphone | Crucial: Add a capacitor between Ground and VCC on the microphone. |
| Audio Amp | MAX98357A I2S Audio Amplifier | Connected to a half-watt, 8-ohm speaker. |
| Trigger | Tactile Button | Used to start and stop the voice recording. |
| Wiring | Separate I2S Lines | Dedicated I2S GPIO pins are used for the microphone and the amplifier to simplify control and avoid noise. |
The AI magic happens on a free HuggingFace Space.
- Create a HuggingFace Account and go to "New Space".
- Space Configuration:
- Space SDK: Choose
Docker. - Template: Select
Blank. - Space Hardware: Use
CPU Basic.
- Space SDK: Choose
- Upload Server Files: Copy the following files from this repository and create them in your new HuggingFace Space (
Filestab ->Contribute->Create new file):Dockerfileapp.pydocker-compose.ymlrequirements.txt
- Create an Access Token: Go to your profile's
Access Tokens, create a "Write" token, and copy it. - Set a Secret: In your Space's Settings tab, scroll down to Secrets and create a new secret:
- Name (Must be exact):
HF_TOKEN - Value: Paste your copied token here.
- Name (Must be exact):
- Wait for the server state to go from "Building" to "Running". Check the Logs if any error occurs.
- Install Libraries: Download and install all required libraries (links in the video description). Note: The ESP8266 audio library works fine with ESP32.
- Code Configuration:
- Enter your WiFi SSID and Password.
- Update the Server URL with your specific HuggingFace Space URL (Pay attention to case sensitivity).
- ESP32 Board Settings:
- Ensure PSRAM is enabled in the Tools menu.
- Select a Partition Scheme that includes SPIFFS.
- Upload the code to your ESP32-S3 board.
- Once the display shows "Assistant Ready", the system is operational.
- Press and hold the tactile button to start recording your voice into PSRAM.
- Release the button to stop recording and automatically send the audio to the server.
- The AI server processes the request (STT -> LLM -> TTS), and sends the response audio back to the ESP32.
- The ESP32 downloads the audio to the LittleFS and automatically plays the answer on the speaker.
Enjoy building your AI Assistant! See you in the next episode!
Maze Escape: https://play.google.com/store/apps/details?id=com.DsnMechanics.MazeEscape
Air Hockey: https://play.google.com/store/apps/details?id=com.DsnMechanics.AirHockey
Click Challenge: https://play.google.com/store/apps/details?id=com.DsNMechanics.ClickChallenge
Flying Triangels: https://play.google.com/store/apps/details?id=com.DsnMechanics.Triangle
SkyScrapper : https://play.google.com/store/apps/details?id=com.DsnMechanics.SkyScraper