- Solution Overview
- Solution Details
- Using the Solution
- Solution Installation
- Manual signing of PowerShell Scripts
One of the security features built into Windows PowerShell scripts is the ability to define an execution policy on the server. The execution policy allows an administrator to restrict the execution of scripts on a server through the use of four different secruity levels:
- Restricted
- AllSigned
- RemoteSigned
- Unrestricted
The Resticted level is the default execution policy which does not allow the execution of scripts in favor of only allowing interactive execution. Operational requirements will likely not allow for this execution policy level.
The AllSigned level only allows the execution of scripts and configuration files that are signed by a trusted publisher. A more practical alternative to Restricted, AllSigned should be the execution policy that is configured in a secure environment.
The RemoteSigned level allows the execution of scripts and configuration files downloaded from communication applications that are signed by a publisher that you trust.
Finally the Unrestricted level allows the execution of any scripts without requiring the script to be signed. This is the most insecure execution policy level since it provides no protection from maliciously modified scripts.
For a more detailed description of PowerShell signing visit Scott Hanselman's page on Signing PowerShell Scripts
In an ideal world we would want to only allow signed scripts to execute however this can be difficult to accomplish if the ability to sign PowerShell scripts is not simplified. This solution is an attempt to simplify the process. Very often one of the first steps for an administrator is to set the execution policy to Unrestricted.
With the influx of PowerShell attacks I believe we need to change this behavior and ensure that critical systems should be configured with the AllSigned level. To accomplish this I have developed a web portal that can reduce the difficulties of signing scripts. One critical component of this solution is the dependency and interaction with GitHub.
There are many benefits of storing PowerShell scripts in GitHub including the sharing of code across teammates and maintain version control for changes and updates. This solution will use GitHub as the source of scripts that are to be signed and downloaded. This interaction with GitHUb allows the solution to not modify the original script during the signing process.
This section covers the components of the solution.
Access to this solution will require Windows Integrated authentication. This is a necessary step to prevent unauthorized access to signed scripts. If a malicious user could generate scripts that are signed by a trusted signing certificate then the execution policy becomes irrelevant.
The name of the authenticated user will be displayed on the footer of every page, as well as included in the header of any download PowerShell scripts.
The web site runs under an application pool configured with a dedicated service account. The service account has been granted permissions to the private key of a digital signing certificate that has been installed on the server. Additional permissions have been granted to the service account which allows for read/write access to the ~/App_Data/ folder where both temporary files and debug log files are created.
The solution web site is built on ASP.NET 4.5 using C# running on Windows Server 2012 R2. Development and testing have been done using FireFox and Chrome browsers though Internet Explorer should work as well. The web site relies on query string data to identify required inout fields on several web pages.
The core of the website uses Master Pages to render a common format across the following pages:
- Main.master
- Default.aspx
- Search.aspx
- User.aspx
- DownloadFile.ashx
The Main.Master page is the template page for all of the ASP.NET web pages. This is a hidden page that contains the page structure and is not directly callable by a web client. Changes to the structure of the page, including the header and footer, would be made in this template file.
The header of the Main.master file includes Meta information as well as links to the style.css and page title. The footer of the Main.master file includes a welcome message to the authenticated user on the left side of the page, and a hidden message of the physical server name serving the web content on the right side of the page.
The hidden server name is for troubleshooting servers behind a web load balancer and can be removed if necessary due to security concerns.
The Default.aspx page is the entry point for the web site and provides two main option to the web user.
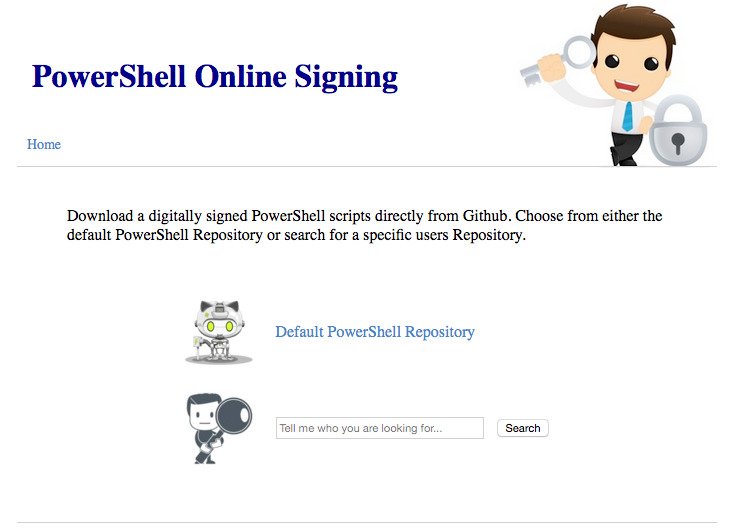
The first option is a link to the default GitHub owner as defined in the web.config file. When the web user clicks on the first option they will automatically be redirected to the User.aspx page with the pre-defined owner name in the query string (e.g. User.aspx?o=dscoduc).
The second option is an input field and search button which allows the web user to search for a GitHb owner. The input field is the search criteria and can include the GitHub owner's login ID, first name, and/or last name. Results are limited by GitHub and if the results don't appear to have the desired owner than a more specific search criteria should be submitted.
When the user clicks on the search button they will automatically be redirected to the Search.aspx page with the search criteria added to the query string (e.g. Search.aspx?s=dsco).
The Search.aspx page is the search page of the web site and provides an input field and search button which allows the web user to search for a GitHb owner.
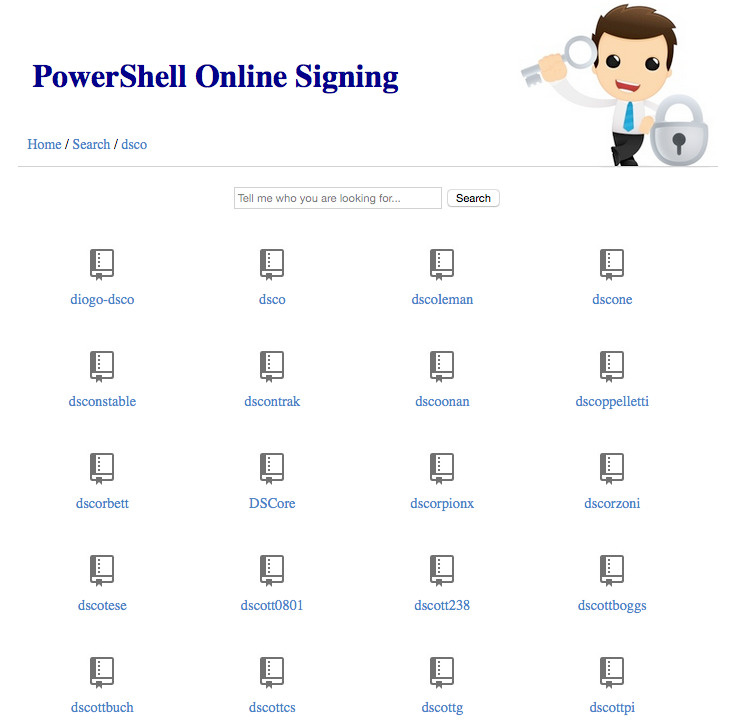
The input field is the search criteria and can include the GitHub owner's login ID, first name, and/or last name. Results are limited by GitHub and if the results don't appear to have the desired owner than a more specific search criteria should be submitted.
When the user clicks on the search button they will automatically be redirected back to the Search.aspx page with the search criteria added to the query string (e.g. Search.aspx?s=dsco). The search results provides a list of GitHub owners based on the search criteria provided in the query string.
If the page request does not include a query string variable of "s" the page will automatically perform a lookup starting with the letter "a".
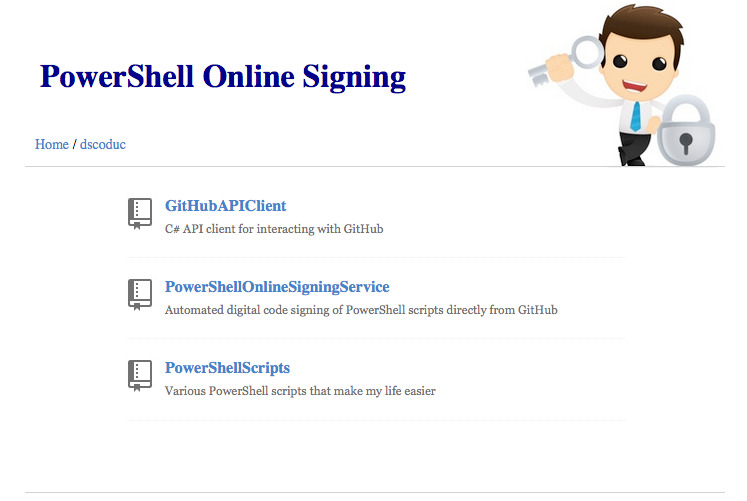
This page provides a list of public repositories or contents within a specified repository. The contents of the page is populated by assessing the query string variables. If the page request does not include any query strings the page will automatically redirect back to itself with the default GitHub owner (as specified in the web.config) added to the query string, then display a list of available repositories.
This page accepts the query string variable "o" which represents the owner login ID. For example, o=dscoduc would display the repositories available for the GitHub owner with the login ID of Dscoduc.
The User.aspx page accepts the query string variable "r" only if the "o" variable is provided in the query string. The "r" variable represents a repository name owned by the GitHub owner. For example, User.aspx?o=dscoduc&r=PowerShellScripts would display the contents of the PowerShellScripts repository for the GitHub owner with the login ID of Dscoduc.
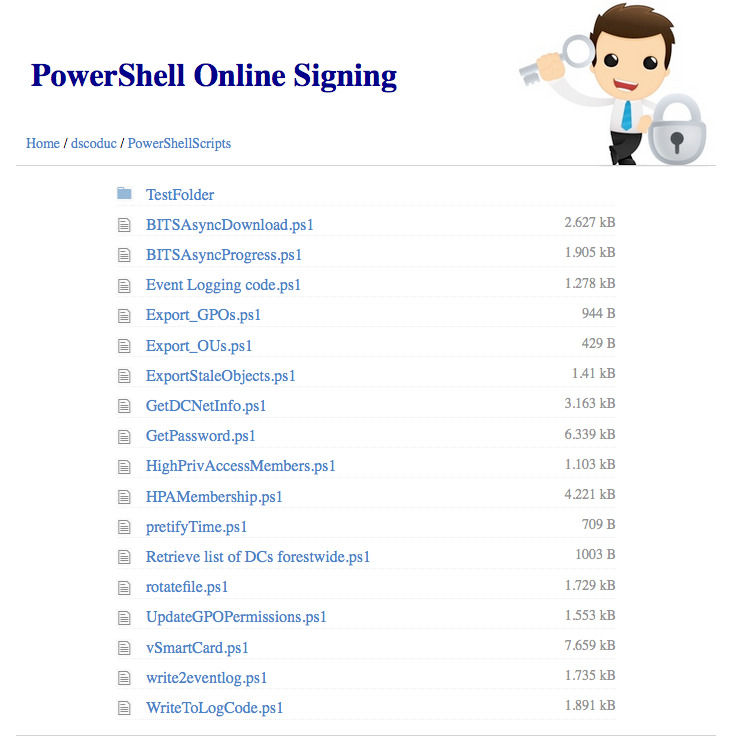
The content path of a GitHub Repisitory object is handled with the query string "p". This can be either the file name you wish to download (e.g. DownloadFile.ashx?o=dscoduc&r=PowerShellScripts&p=GetDCNetInfo.ps1) or the name of a folder within the Repository (e.g. User.aspx?o=dscoduc&r=PowerShellScripts&p=TestFolder)
This DownloadFile.ashx page is a dynamic page that is used to process the request for a file from the GitHub repository specified in the query strings.
This page requires the owner, repository, and path query string variables to be populated - calling this page without providing a complete query string variable list will result in the page displaying a "File not found" error message.
When the DownloadFile.ashx page is requested the web server will perform the following steps:
- Download the requested script file from GitHub to the ~/App_Data/ folder into a random temporary file name.
- Insert/replace a header on the temporary file that includes the name of the authenticated user (used for auditing who requested the signed script)
- Call PowerShell to sign the temporary file using the available signing certificate
- Serve the signed PowerShell script file to the web user
- Delete the temporary file from the ~/App_Data/ folder
This section outlines the settings within the web.config file.
This entry defines the url path to GitHub api address for your environment (omitting the https://). For the Internet GitHub the setting for this entry would be api.github.com. For an Enterprise GitHub the path would be hostname/api/v3/
Default value = "api.github.com"
This entry defines the authentication token used to connect to the GitHub repository.
If access to your GitHub server is resricted to authenticated users then an auth_token is required for this solution to work correctly.
Default value = ""
This entry defines the title displayed on the web pages.
Default value = "PowerShell Online Signing"
This entry defines the default repository owner for home page link
Default value = "dscoduc"
This entry defines the default repository name for home page link. If the entry is blank then the home page link will redirect to the default_owners list of repositories.
Default value = ""
This entry defines how long in minutes the response date from the server web requests to GitHub should remain in cache.
Default value = "30"
This entry provides the ability to set a custom user-agent provided by the web server to GitHub when peforming a web request. GitHub requires a user_agent value though it doesn't care what is provided.
Default value = "curl/7.43.0"
This entry defines which files in a repository will be displayed to the web user. This soluton can only sign PowerShell scripts so the default value is to only show .PS1 files.
Default value = "^.+.((ps1)|(ps1))$"
More information about the query string variable structure can be found in this section.
- Owner
- Syntax: ?o={ owner login ID }
- Example: User.aspx?o=dscoduc
- Available on User.aspx and DownloadFile.ashx
- Repository
- Syntax: &r={ repository name }
- Example: User.aspx?o=dscoduc&r=PowerShellScripts
- Requires Owner variable
- Avaialble on User.aspx and DownloadFile.ashx
- Path
- Syntax: ?p={ content path }
- Example: User.aspx?o=dscoduc&r=PowerShellScripts&p=SubFolder
- Example: DownloadFile.aspx?o=dscoduc&r=PowerShellScripts&p=myScript.ps1
- Requires Owner and Repository variable
- Search Criteria
- Syntax: ?s={ search criteria }
- Example: ?s=dsco
- Availale in Search.aspx
To assist in the handling of JSON responses coming from GitHub this solution relies on the Newtonsoft Json v7.0.1 framework. This allows a quick translation from JSON to a C# object class.
More information can be found at Json.NET Newtonsoft
To handle the logging this solution relies on the Log4Net v2.0.3 framework. This framework simplifies the handling of writing to both a log file and the Windows Event Log. A configuration file named log4net.config is placed in the root of the website and contains the settings required for the solution to log effectively.
More information can be found at Apache Log4Net Website
This section outlines how the web site might typical be used. In these examples dscoduc has been configured as the Default PowerShell Owner in the web site configuration file.
In this scenario the web user is looking for a script in the default PowerShell Repository that contains a common shared list of PowerShell scripts.
- A web user connects to the web site and lands on the Default.aspx page
- The web user selects the Default PowerShell Repository link
- Their web browser is redirected to User.aspx?o=dscoduc
- A list of available repositories is displayed that includes all public repositories
- The web user selects the repository named PowerShellScripts and their web browser is redirected to User.aspx?o=dscoduc&r=PowerShellScripts which displays a list of PowerShell scripts available to download
- The web user clicks on the PowerShell script named Export_OUs.ps1
- The web browser is redirected to DownloadFile.ashx?o=dscoduc&r=PowerShellScripts&p=Export_OUs.ps1
- A dialog is displayed prompting the web user to download the file Export_OUs.ps1
In this scenario the web user is looking for a script in a co-workers repository.
- A web user with a GitHub login ID of dscoduc connects to the web site and lands on the Default.aspx page
- The web user enters dscoduc into the input field they click on the Search button
- The web browser is automatically redirected to Search.aspx?s=dscoduc
- The server performs the search and determines an exact match with the search criteria
- The web browser is automatically redirected to User.aspx?o=dscoduc
- A list of available repositories is displayed that includes all public repositories
- The web user selects the repository named PowerShellScripts and their web browser is redirected to User.aspx?o=dscoduc&r=PowerShellScripts which displays a list of PowerShell scripts available to download
- The web user clicks on the PowerShell script named Export_OUs.ps1
- The web browser is redirected to DownloadFile.ashx?o=dscoduc&r=PowerShellScripts&p=Export_OUs.ps1
- A dialog is displayed prompting the web user to download the file Export_OUs.ps1
In this scenario the web user is looking for a script from a co-worker. They are not exactly sure of the persons login ID so they need to do a search to find the co-workers login ID.
- A web user connects to the web site and lands on the Default.aspx page
- The web user enters dsco into the input field they click on the Search button
- The web browser is automatically redirected to Search.aspx?s=dsco
- The server performs the search and determines there are 10 matching owners and displays a list of owners login ID's
- The web user decides they are unable to identify the co-workers login so they enter the co-workers last name Blankenship into the search criteria in the inout field, then they click the Search button
- The server performs the search and determines there are 3 matching owners and displays a list of owners login ID's
- Having found the co-workers login ID they click on the login ID in the list
- The web browser is redirected to User.aspx?o=dscoduc
- A list of available repositories is displayed that includes all public repositories
- The web user selects the repository named PowerShellScripts and their web browser is redirected to User.aspx?o=dscoduc&r=PowerShellScripts which displays a list of PowerShell scripts available to download
- The web user clicks on the PowerShell script named Export_OUs.ps1
- The web browser is redirected to DownloadFile.ashx?o=dscoduc&r=PowerShellScripts&p=Export_OUs.ps1
- A dialog is displayed prompting the web user to download the file Export_OUs.ps1
This section covers the installation of the solution.
This section displays the folder and file structure incuded in the solution. For each folder name there is the account and permissions required for the solution to work correctly. After copying the source files into the desired root folder (ex. PowerSign) you will need to delegate permissions to the IIS_IUSRS and Application Pool account.
This section assumes the root folder name is PowerSign and the Application Pool account name is PowerSign.
- PowerSign (IIS_IUSRS +R/W)
- App_Data (IIS AppPool/PowerSign +R/W/M)
- Website_Debug.log
- bin
- GitHubAPIClient.dll
- GitHubAPIClient.pdb
- log4net.dll
- log4net.xml
- Newtonsoft.Json.dll
- Newtonsoft.Json.xml
- PowerShellOnlineSigningService.dll
- PowerShellOnlineSigningService.pdb
- images
- emptyrepo.png
- file.jpg
- folder.jpg
- github.jpg
- githubrobot.png
- repository.jpg
- searchman.jpg
- securityguy1.png
- user.jpg
- Default.aspx
- DownloadFile.ashx
- favicon.ico
- Global.asax
- log4net.config
- Main.Master
- Search.aspx
- style.css
- User.aspx
- Web.config
- App_Data (IIS AppPool/PowerSign +R/W/M)
It is recommended that an Application Pool is pre-created before creating the web site. The following steps can be followed to create the Application Pool.
- Launch IIS Management Console
- Expand the local server name and select the Application Pools entry
- Right click on Application Pools and select Add Application Pool
- For Name enter PowerSign
- For .NET CLR Version select .NET CLR Version v4.0.30319
- For Managed Pipeline Mode select Integrated
- For Start Application Pool Immediately select Unchecked
- Click OK to complete the creation
The following steps can be followed to create the web site.
- Launch IIS Management Console
- Expand the local server name and select Sites
- Right click on Sites and select Add Website...
- For Name enter PowerSign
- For Application Pool enter PowerSign
- For Physical Path enter the path where you copied source files (ex. c:\inetpub\PowerSign)
- For Type select HTTP
- For IP Address select All Unassigned
- For Port enter 80
- For Host Name leave blank
- For Start Website Immediately leave it unchecked
- Click OK to complete the creation
- Right click on the new PowerSign site and select Edit Bindings
- Click on Add to display Add Site Binding
- Click on Type | http and select https
- Click on the SSL Certificate drop down and choose the appropriate web server certificate
- Click OK to save the settings
- Click Close to close Site Bindings
- Locate and double-click on the Authentication option in the Web Site settings
- Right-click on Anonymous Access and click Disable
- Right-click on Windows Authentication and click Enable
- Click on the PowerSign site on the left column
- Locate and double-click the SSL Settings option in the Web Site settings
- Click on the Require SSL checkbox and click Apply in the Actions pane on the right side of the management console
- Click on the Application Settings option in the Web Site settings
- Update the entries with information that matches your environment (ex. auth_token and default_owner)
- Right-click on the PowerSign site and select Manage Website | Start
This section covers the configuration of the digital signing certificate. These steps assume a digital signing certificate has already been issued and installed onto the web server.
- Launch the local machine certificate management console (ex. certlm.msc)
- Expand Certificates - Local Computer | Personal and select Certificates
- Right-click on the digital signing certificate and select All Tasks | Manage Private Keys...
- In the Permissions for certificate click on Add
- In the Select Users or Groups enter the name IIS AppPool\PowerSign and click OK
- Select PowerSign and ensure the Read checkbox is selected
- Click OK to save and close the delegation window
The following section describes the manual way to sign a PowerShell Script. This section assumes that a signing certificate has already been installed on the computer and the script path is C:\scripts\MyScript.ps1.
- Launch an elevated PowerShell console
- Map script to variable with $file = "C:\scripts\MyScript.ps1"
- Locate signing certificate with $cert = Get-ChildItem cert:\CurrentUser\My -CodeSigningCert
- Sign file with Set-AuthenticodeSignature $file $cert[0]
- Verify file signature with Get-AuthenticodeSignature $file